What Do (Ceramic) Artists Want? A Blog Blast

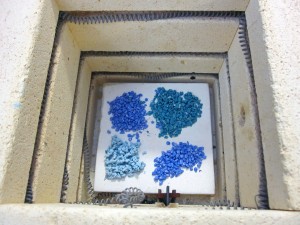
Today's Kiln Yield (the good ones, anyway)

Before delving into the main question, here’s what I mean by a Blog Blast. For the past few years I’ve written longish posts. I compose and edit as I go (a not so good idea), making nifty essays which even I did not have time to read, even though they were worth it, IMHO. No more. Here’s to the short, pithy, candid and extemporaneous post. Longer than a Tweet or a Status Update, shorter than War and Peace, or even a term paper. Still worth it. Still friends.

All Bow!
I know what I want from my ceramic endeavors: the realization of what I had in my head to begin with, only better! I want the Kiln Gods to undo my ham-handedness, my fear and laziness, my lack of knowledge and brain farts. I want nothing less than Transformational Magic, that slice of perfection that no ceramic piece in the world has heretofore attained…until now. All bow.

I’m no different. And sometimes I do get that, briefly. As in performance arts, I feel I am only as good as my last kiln opening. So, when I don’t get the fairy dust, this is how I understand it.

Did I Take the Short Way Home?
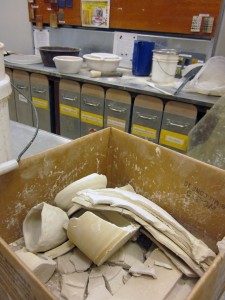
Warps, cracks and breakage is the norm for mishandled clay. Glazing faults abound: wrong material/color choice, misapplied, too shiny, streaky, runny, bubbled. These are obvious flaws (except when they’re not because you wanted this exact messed-up result. After all, it’s contemporary art we’re talkin’ about!) Flaws are mostly not too fixable. Better to love and honor the quirky properties of clay and glazes on the front end. But when it does not go well in these departments, have your disappointment, even your everlasting shame and tantrum, then get out the hammer and start over. Oh, and learn to gently amend and refire a little too. Smash seven times, make anew eight. Get back on the cylinder that threw you. Learn to fly with your craft, bird by bird. No way out but the long way.

Got Appreciation for What Is?
What’s harder to understand is when a piece is gorgeous, but just not the specific gorgeous its creator intended. It happens to all of us: the heatwork of the kiln changes things and we hold treasure and call it trash only because it wasn’t what we ordered. The piece is too dark, off the expected color, bled or shrank weirdly. Whatever it is, it failed to meet our prior specs and we’re ready to smash once again. But wait! Tuck this one away somewhere, maybe for months, and then look at it without the pangs of former expectations. You might return to the “amend and refire” mode, you might decide it’s a true goner, or you might see it for what it is.

What to Want
And here’s the Tricky Bit: Don’t settle for “good enough.” Good: the enemy of Best, right? While it might sound like I suggest seeking only objective perfection, it’s really personal excellence which excites me. I may joke about wanting it all from the Kiln Gods, but I know what I alone put out there steeped in my heartfelt best comes back. Often better than I know to want, challenging me to keep stretching. I seek repeated opportunities to do exactly that.

That’s what (ceramic) artists really want.
Share this:

Unweaving a Rainbow: What Makes Something Beautiful?

Investigate Everything!

Some of you might not want to parse out what makes one thing more beautiful than another. I completely understand. Keats complained that Newton had “destroyed the poetry of the rainbow by reducing it to a prism.”

I’m here to meld that duality and I contend further that prism and poetry can co-exist fruitfully. In fact, in order to make my best art, I require that generation of The Third which emerges from Opposites.

I’ve tried the romance of just messing around with the crayons, the keyboard, and the clay, rather juvenilely hoping that the lightening bolt of genius will make a lucky strike. (Even sometimes thinking it actually did, for me.) Ultimately, though, it’s like playing Blackjack: while the odds are better than most games of chance, they still are in the House’s favor, not mine.

Goal-less and right-brained fooling around is creatively essential, but it is a warm-up: the beginning doodle, the free-write, the initial pinching, coiling and rolling. It so rarely makes it to that zen place of offhanded perfection, as much as we might be glancing over our shoulders to see if it did.

To take my craft into beauty and excellence –leaving the lightening bolts to shock themselves –I explored the nature of the creative process, studied Color Theories and The Principles and Elements of Art until I felt conversant and sometimes even fluent.

In other words, I got scientific and it helped. Now I could not only wonder at the rainbow’s glories, I could unweave it and put it back together in my own poetic way.

When I changed my art-making from 2D mixed media to 3D ceramics, a whole new set of loveliness standards came into play. What about Line and Form in Space? What about that Viewer in motion around the piece – or actually using it? What about Front, Side and Back? Top and Bottom?

So…. besides sticking to the work in my studio evolving my efforts, besides near constant conversations with mentors, colleagues, fellow enthusiasts and supporters, besides Art History courses and museum gallery visits, and besides deep thought on what motivates and thrills me, I read books.

And here are those that I deliciously don’t quite understand, but every time I delve through them, a little more is revealed:

The Nature and Art of Workmanship and The Nature and Aesthetics of Design, both by woodworker David Pye. If you click on the links, you will get descriptions and reviews. (Don’t miss the one for the Design book by wiredweird! I can’t describe the power of this book any better.)

Li: Dynamic Form in Nature by David Wade

And two exploring the realms of Sacred Geometry, whose philosophies lie at the heart of my seeking the Music of the Spheres in all I do.

Sacred Geometry by Miranda Lundy

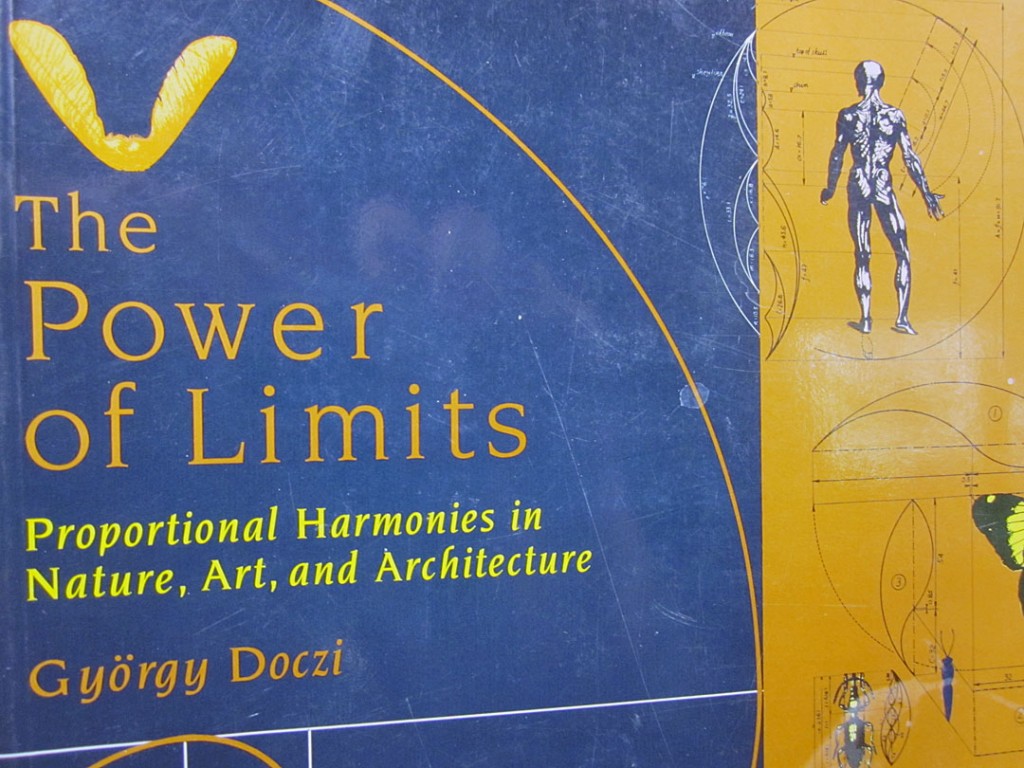
The Power of Limits: Proportional Harmonies in Nature, Art and Architecture by Gyorgy Doczi. The cover of my edition gives a hint of how the author connects the Golden Mean and the Fibonacci sequence to both the natural and visual world: with the language of mathematics.

Certain proportions occur over and over again joining unity and diversity

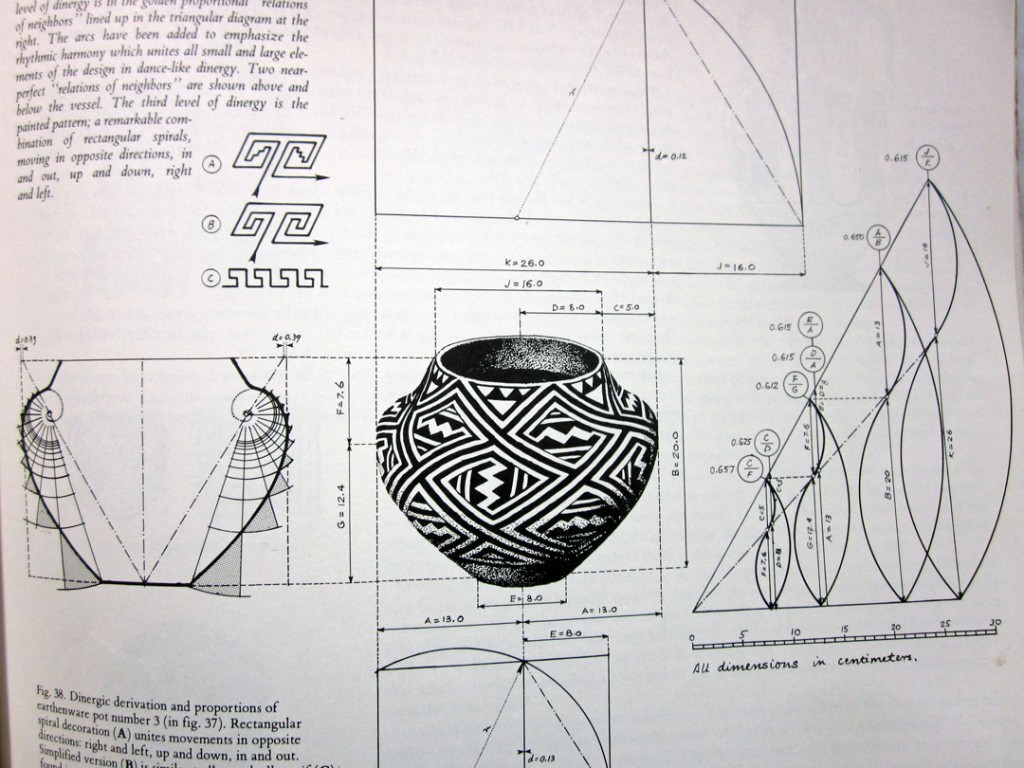
Herein lie richly illustrated pages with examples from plants, crafts, animals, Art: both ancient and modern, writing, the human body, music and more, all pointed toward a revelation of cosmic order so universal the author coined a new word for it Dinergy. “…Made up of two Greek words: dia — ‘across, through, opposite;’ and ‘energy.'”

A sample page.

So this is why Acoma Pottery is so pleasing! (Hint: maybe)

So what makes something beautiful? It’s surely not book learning and the methods of parsing, unweaving, reducing and dissecting! I don’t play around with numbers at all, I make art.

Rather, it’s about understanding that essential beauty’s out there, we’re all capable of perceiving it and here’s a Tiny Bit o’ Why. We may wildly disagree on specifics because there are many ways these patterns manifest.

Time, place, culture, narrative and materials don’t matter, yet there it is: A certainty of visual knowing instinctive and true.

I swear this knowing is how I sense when a work is done. There’s an out-breath, a hand relaxation, a satisfaction, all related to the cessation of seeking more for that piece. The rainbow is rewoven for now and I don’t need to measure it to make sure.

Share this:

5S Methodology, Mise en Place and My New Studio

Hot stuff wall paint is named Briquette

PART ONE: The Set-Up

Legions of artists fantasize about The Perfect Studio. Whatever the particular siting, configuration and appointments, it comes down to it being a vortex of personal creative energy where the conduits of genius become pure and we are blissful.

I’ve walked around a few incredible art-making habitats, many with zen views, which gave my artist’s soul the same frissons as Disneyland’s Peter Pan’s Flight did for me at age 6.

After the thrills, though, come the tidal waves of malicious envy followed by the dirty backwash of self-admonition: “A lot of artists don’t have any studio at all!” The Voice nags. So I go clean and rearrange one more time, dutifully attempting to bloom where I’m planted.

Sometime late last year I got a case of INeedABetterStudio-itis that was not induced by envy or guilt, but by a strong re-conceptualization of how I work best. I noticed things go better for me in my creative space when:

1. It has an open feeling with largish work tables and good task lighting.
2. It has dedicated places for tools, supplies, and other necessaries and they are clearly labeled.
3. I have separate areas for wet clay forming, bone dry and bisque work, and for decorating and photographing work.
4. Deep storage and side activity supplies are not visible.
5. It is inviting and pretty easy to keep clean.
6. There’s a private feeling, separate from my household.

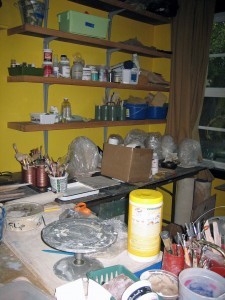
Those were the qualities that I kept seeking in the yellow space, a large back bedroom located off the laundry/pantry pictured below. But, I was asking too much of it. I wanted it to be an active studio as well as a major seasonal storage area, a photography studio, an Etsy Shop inventory and shipping area, a place to stage and prep my outside-the-studio teaching and volunteer projects, an art reference file cabinet and a mini meditation hall. No wonder I had no lasting success in wrassling it into a dream studio!

Free Swimming in the Creative Soup

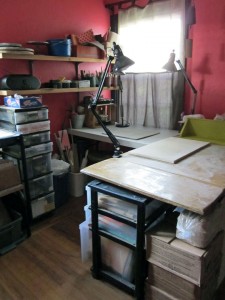
It was clear, though, that I would not be moving off-site, out in the yard or be converting the living room. What, oh what to do besides more Sisyphean tidying? Eventually it occurred to me I could switch out two rooms by moving the active studio around the corner and down the hall to the off-the-beaten-path red room, taking only the necessaries with me and leaving the other functions behind to be joined by the exercise equipment.

And that is what I did. See the just-moving-in shot at the top of the post.

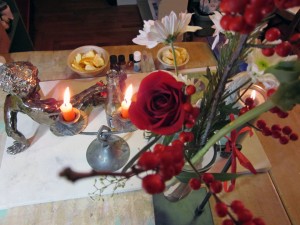
A few weeks later, I performed a dedication ceremony thanking “the divine cockeyed Genius assigned to my case“, by clearing and blessing the newly-born space.

Flowers, Candles, Oranges, Incense, Salt and Rattles

PART TWO: The Never-ending Conclusion

As I continue to pay attention to what I need in my studio (to make it vortex of personal creative energy by opening the purest conduits to genius and thereby fostering my ultimate bliss,) I make adjustments.

I stand when I work, so I propped the tables up on bedrisers and topped them with HardieBacker board, a smooth and durable work surface. As a bonus, the higher tables make the storage beneath them accessible without groveling.

I can reach everything on all the shelves, no footstool required, and I am able to keep stuff nearest to its likely use.

I swung the decorating table 90 degrees to create more elbow room, found sturdy, stackable clementine boxes to hold everything on the shelves and labeled them, got rid of the odd-shaped wareboards, threw out the broken and moldy and gave away anything not often used.

Albert Einstein, an earthly genius, said, “Things should be made as simple as possible, but not any simpler.” In the spirit of simplistic balance, I am scrutinizing my remaining tool collection and questioning why I have 8 cut-off wires, 16 needle tools, 23 ribs, dozens of similar wooden modeling tools, a deep drawer full of sponges and a whopping 212 brushes – I just counted them!

I think the bulk of these need to go. They are going.

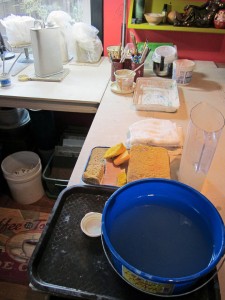
In practice, I only use about 20 favorites from all categories, which I keep handy on my right side along with my water tub, spray bottle, sponges, hand towel, brushes, slip container, and a cache of beloved sticks, straightedges and dowels. It’s an artist’s version of a mise en place, which works really well and I have begun to hone.

I now drive a custom cockpit of ceramic creation. Here’s a non-action shot (because an action shot would be less clear.)

A way of working that works

My entire studio is becoming a pretty decent personal version of Japanese workplace organization called 5S Methodology

1. Sorting (Seiri)
2. Setting in order (Seiton)
3. Shining (cleaning) (Seiso)
4. Standardizing (Seiketsu)
5. Sustaining the discipline (Shitsuke)

There are three other Ss that accompany this methodology: Safety, Security, Satisfaction. While they mean something different for factories and schools, I see them more as positive emotive qualities, emanating from the newly organized and clean space, helping me feel professional by fostering my sense of privacy, comfortable confidence and pleasure in my craft.

It’s a practice, this studio functionality perfection biz, but, I swear, now that I don’t need to kick a fire lane in to the work area every time I enter, only to stand there both fog-brained and hyper-distracted – essentially pre-defeated by the disarray – I’m making better art and having a way better time at it too.

Share this:

How to Color Your Own Ceramic Aquarium Gravel

Thickening without Glassifying

If you think that generating thousands of just-right tiny chunks of dried clay in order to have ceramic aquarium gravel is madness, you would not be far wrong. But it ends up the rewarding kind of madness, as you shall soon see.

I really did not think this through! But how could I? No one I know and no one they know has done this, so it has been necessarily one foundering discovery after another.

After hand-generating the gravel, those buckets of tiny bisqued chunks need coloring. But glazing them won’t work; the glass-forming ingredients in glaze will simply fuse them in a lump to the kiln shelf. A rookie mistake. Perhaps a nice effect when done on purpose, but for another project. (Hindsight Hint: generate the next batch of aquarium gravel with pre-colored clay and call it done!)

If I couldn’t use glaze, then would mason stains, oxides or underglazes stick well and evenly? The viscosity of underglazes can be thin and take three coats to cover well, but they seemed to offer the strongest color in the easiest format.

At the first try, the bits got too wet and wound up unable to bind with the color. It looked a little like bluish barf: color in a flat puddle punctuated by the pinkish chunks. Dang. I let them dry overnight while I felt a bit queasy over it. I considered the possibility of resorting to acrylic paint….but that thought both freed me and bolstered my resolve to find a fired-on solution.

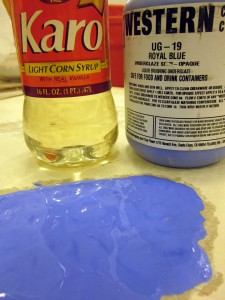
I talked with the deeply resourceful Gail Ritchie and we agreed we needed to add something which would sticky-up the underglaze, but not be glassy in the slightest. We came up with CMC gum fixative, Karo Syrup, honey, maple syrup…..all of which we theorized would help the underglaze attach while it dries and then burn away in the kiln, it’s job done, leaving the gravel in beautifully-colored separateness.

Karo Syrup was handy. Karo worked! Best use for Karo Syrup since homemade popcorn balls.

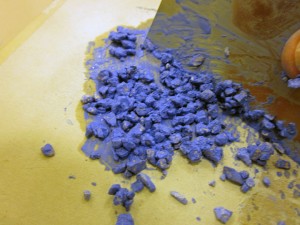
I added a few large drops of Karo to about 2T of underglaze…stirred well, and then mixed in the gravel sample to make a thick and dry-ish sticky mound.

Mixing the Bisqued Gravel with Karo’d Underglaze

For most of my samples, I used a heat gun to gently dry and separate each pile and then handled it as little as possible to avoid knocking off any hard-won color. I left one pile wetter and fully connected, just to see if that mattered…and while every sample fired up evenly colored and separate, the wetness of that one damp batch left a lot of color on the kiln shelf, which I needed to scrape off and re-coat the shelf with kiln wash. It’s worth it to dry things before firing them.

Here’s what the little test kiln known as Sparky looked like when I opened it the next day. So fine!

Lovely little colored piles

Ceramic aquarium gravel-making has been the full creative catastrophe, with a happy ending. I’ve worked harder both physically and mentally and it’s taken scads more time than expected. Ironically, this gravel is only a bit player – pun intended – in the finished ceramic Aquarium Set-Up For Sale piece I envision. In that respect, it’s like fine silk lingerie, something usually only the wearer knows about, but great for self-confidence.

Every speck of ceramic aquarium gravel represents the whole effort to me now and I find I cannot let even one fall off the board or over the edge of the kiln shelf. They’re shards of meaning and intent, like artistic DNA, each carrying the whole idea.

Share this:

How to Make Your Own Ceramic Aquarium Gravel

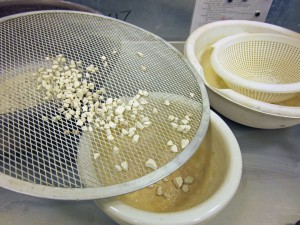
Bone Dry Chunks with Bowl and Sieve Labscape

Notice I only said How and not Why.


If you’re thinking of real gravel for your real aquarium, the Why becomes problematic. Why do that when it will take a full workday plus overtime to grind enough gravel to fill a ten gallon tank to two inches? Why ever do that when there are unknown toxicity issues with underglaze and oxide colorants that your prize fish may demonstrate by dying on you?

No, this gravel-making is a completely sculptural endeavor of my own device. It’s one item of many spurred by the Cabrillo College Ceramics Department’s proposed installation at the annual California Conference for the Advancement of Ceramic Art held in Davis, CA at the end of April.

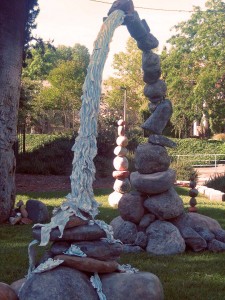
A Magic Realist Ceramic Rock Portal

We’re following up our fantabulous 2010 Cabrillo Rocks Portal installation -pictured above – with a life-sized out-on-the-lawn trompe l’oeil ceramic Yard Sale! Folks are right this minute working on fishing gear, globes, games, toys, linens, shoes, hats, bags, skateboards, dolls, a bake sale and then whatever else we can concoct between now and then.

I’m offering a used aquarium set-up: a real aquarium with clear glass, but with the frame painted white (like all our tables, shelves and props will be) and everything else in it ceramic. I plan delicious tongue-in-cheesy mermaids, sunken ships, broken Greek columns…along with faux warped and stained cardboard boxes containing the pump, heater, filter, and canisters of fish food, medicines and a net. A complete mock set-up! Just needs fish and water. $30 OBO.

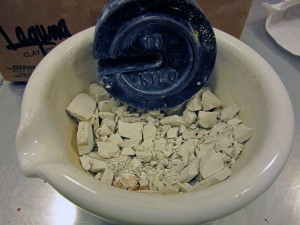
Hence the gravel. It’s important to the faux-y integrity of the piece for me to make my own. But HOW???? My first approach was to bust up bisqueware with a hammer. Too hard. Too sharp. Too uncontrollably uneven. It’s much easier to chunk up potato-chip brittle bone dry clay – which is essentially “dust held together by memory” according to one wise kiln tech I have known.

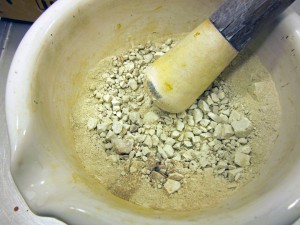
I used a mortar/pestle in the clay lab, but started with the densely heavy 10kg weight as shown below.

Bonedry wares returning to Dust

Then came the pestle which got the pieces to a mix range of pure dust to pea gravel sized.

Crush Just Fine Enough, No Finer

Next, a trip through a series of fine to coarse strainers and meshes straight out of my kitchen. Put the gross chunks through a fine sieve to get rid of the dust and too-teensy bits, pour what’s left onto a pizza screen and shake. The perfect size falls through!

Fine mesh behind; Pizza screen mesh in front

Continue to crunch up the leftover big pieces, then sieve, screen and shake a few more times. Sieve the inevitable dust out of the desired gravelly size and collect in buckets until there is enough volume to acceptably fill the tank. Plan on around ten hours of this in order to have enough volume, factoring in the clay body shrinkage.

Also factor in sore shoulders, upper back and arms, temporarily-impaired hearing from hours spent in the drone of the glaze room’s exhaust fan, and the gag factor from wearing a particulate mask until the creases in your face are nearly time-worn. All pretty unavoidable.

I’m pleasantly aware that making gravel this year is an act of “decomposition” regarding last year’s rocks and am lovin’ the strange parallel.

In the next-related post on this topic: garishly coloring this gravel and making tired boxes and whatever else has come up.

Share this:

Claiming A Character in a Plain Clay Cylinder

Each face is unique; it has to be

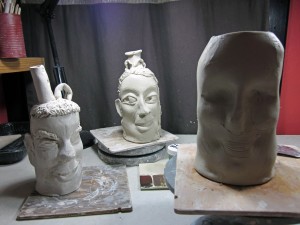
A new series of face jugs has begun! Similar to the Local Talkers 2009 in that they are based on the faces appearing in the 2011 Local Talk column of the Santa Cruz Good Times, but different because each one is full-sized and meant to be a stand alone work.

I’ve lifted some of the limits I placed on myself in 2009, in that I can choose one or more faces/respondents a week, or none. And I can base my choice on expression and/or on what the person says.

Each jug is stamped with that person’s first name, last initial and one word of their reply to the question of the week. In the top photo are, left to right, Cecil U. Stopped, Kate K. Y and what eventually became Nicole B. Amphitheatre.

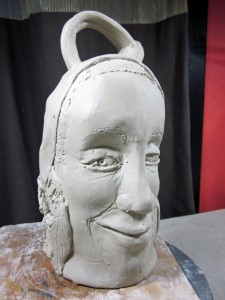
Here she is at leatherhard before being cleaned up and getting the base coat of underglazing.

Love the headband and the earrings!

And just for fun, here’s a close up of the source face.

Facing the camera and smiling slightly

For me it’s not about creating a photographic likeness, but an energetic and gestural one. The clay jug form has its own demands that must be served. The cylinder needs to balance in all ways. It can only stretch so far. It can’t get too heavy with add-ons. (Hair!!!!) It needs to function as a vessel, although I’m finding I care less and less about that as I go deeper into sculptural expression. I just might be getting to the same place as sculptural teapots which are generally full of narrative and SO not meant to be used for serving tea!

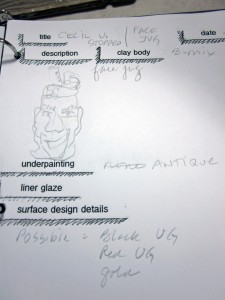
I am keeping better studio records this time too. Here’s the page so far for Cecil U. Stopped.

SO much better than binder paper!

So, that’s my Studio Report at the outset of one thematic series I will be exploring this year. The face jugs provide a looser more organic foil to the other works I’ve got going and I like that I get to find my way from the plain cylinder to the character waiting to take form.

Share this:

Time and Gravity Fall Down Go Boom

Fallen Sphinx Totem

It happens several times daily: the dog pushes open the back door to get in and I am too pre-occupied to get up and shut it. Besides, we are having weeks upon weeks of the best Summer-in-the-Winter ever here on the Monterey Bay and there is no need to batten the hatches. The daffodils are blooming and the bugs are still asleep, a sweet time.

Last week Zorro, our sly XL Mini Schnauzer, pushed himself inside and disappeared around a corner. Shortly, I heard an emphatic crash which ended with semi-tinkling flourishes. Well, that got me up! I wasn’t sure where the sound came from and found no obvious broken dog messes anywhere in the house. Nothing jiggled off the dryer, no artwork detached from the walls, my studio remained quietly waiting for me. The dog was unconcerned. I concluded that because of the open door I must have heard one of our (nine – but that’s another story) neighbors, or the roofers three doors down. Back to my pre-occupations.

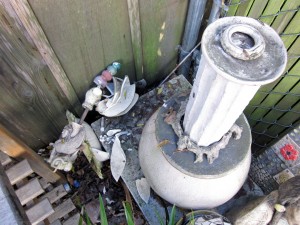
What fell is pictured above. It has been a fixture in the side yard for years and it fell over behind plants, a wooden cart and the fence so I didn’t notice it until days later. I called it the Sphinx Totem and it is still one of the most wildly complicated things I have ever pulled-off in hand-building ceramics class.

Each of its parts were soulful references to ancient and classical imagery, the entirety crafted to resonate with the sacred geometry of the Golden Mean as explored and diagrammed in the commanding book The Power of Limits by Gyorgy Doczi.

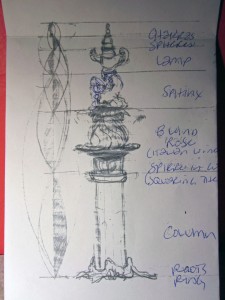
I can’t locate a photo of the completed piece in its former wholeness. Instead, I found my concept drawings:

Sphinx Totem Sketch with Golden Mean Harmonics

Starting at the bottom, a ring of roots surrounding a Greek column – a column being a formalized tree as well as an axis mundi. On top of the column a sphere within a cube frame. Then a large shallow bowl windrose with symbols for the eight winds of the Mediterranean around its rim. Above the windrose, an s-ribbed wind turbine which I had designed to spin at the slightest puff, but inertia and friction have long-proved to be fearsome contenders.

Guarding the whole piece at eye level, the Sphinx, one of my first figures in clay. She’s magnificently capable of issuing a perplexing riddle. She rendered the top pieces – a fairly graceful Lamp of Learning and a lumpy Rub ‘n’ Buff-colored Chakra Tower – mere finials of denouement.

The interior support for this four foot high twelve-part affair was a metal pipe which went about half way up, with a longer wooden dowel inserted into it running the entire height. As predicted for Someday, the dowel rotted and broke at the exact top of the metal pipe, toppling everything higher than the axis mundi onto the marble, bricks, and Mexican river rocks below. Teetering Empyrean! Someday’s arrived!

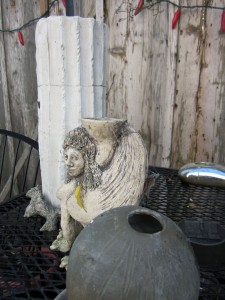
Years of ceramics have left me with little resistance to the shardy reality of a broken Opus. This might be an oxymoron, but I felt rather Vulcan: it was fascinating! I photographed it, swept up the pieces and noted that my favorites survived whole: the roots ring, the column, the Sphinx.

What's meant to remain

I take this as a sign of necessary evolution and simplification, of putting away childish things, of movement and progress, crossing the bridge, fording the river, sailing to the New World. I am blessedly released from a certain kind of past and this crash reinforces it.

With a new studio, the new year, new associations and the ACGA Exhibiting Member acceptance, fresh vistas have appeared. And while a few somethings, even significant ones, are lost, Time is currently sending more fascination than lack. Gravity is just not all that grave right now.

Fall seven times, rise eight as the saying goes. But maybe it’s easier than that; maybe falling is like autumn leaves, utterly natural… and if we trust and allow, don’t mope and protest, and stay fascinated, we see that rising up and leafy renewal are already written within Fall Down Go Boom.

Share this: