Love the Slab You’re With, Part Two


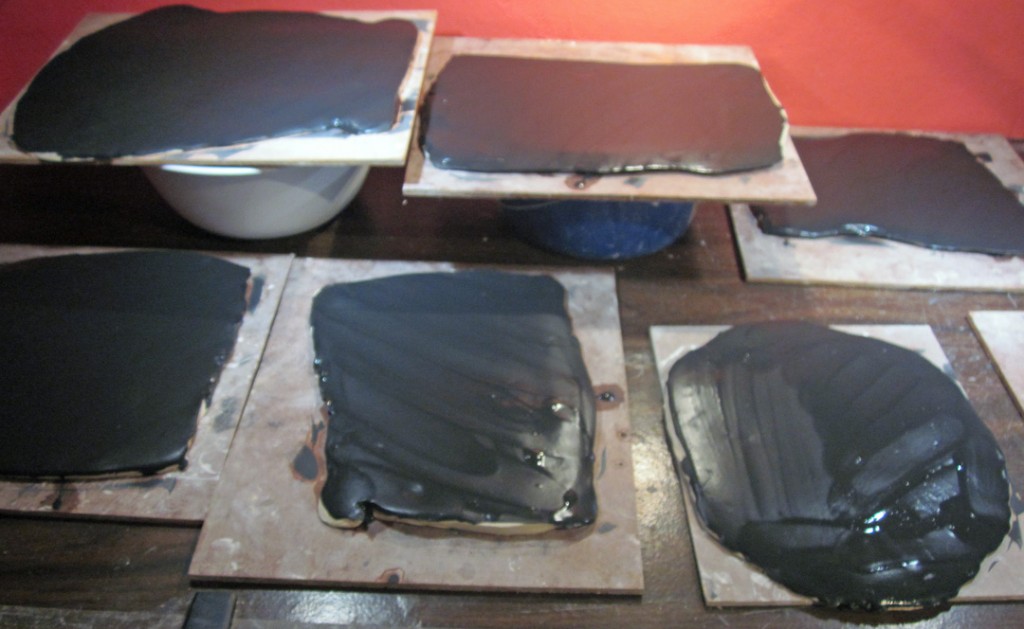
You’ve got a batch of wet colorful, marble-y, strata-fied  slabs now,  as a result of trying the underglaze decorating methods outlined in the previous thickly illustrated post, which is naturally titled LTSYW, Part One. What oh what can you do with them?

I have a hunch we have all  just begun to see what. For that reason, I plan to relate the paltry few things I’ve done and noticed when I tried, and leave it at that. There really aren’t any appropriate Do This and Then That instructions from here on out, because the technique is wide open to expression and experimentation.  I’ll throw down a few dots, but you get to connect them any way you discover. Lana Wilson – the source of this technique for me –  says the same in her handouts: “Play.” “Experiment.” “Play. Play. Play.” I, too, learned by playing and wish that fun for you!
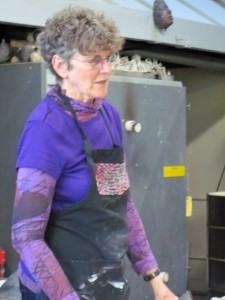


Before I leave my dotted breadcrumb trail,  let’s take up what I think Lana is getting at when she calls herself “The Queen of Low Standards.” First, it infuses a workshop atmosphere with relaxation, fun and the gifts of imperfection. She says it more than once in the course of several hours, for tension-releasing laughs, for instant forgiveness when a demo goes awry, for purposely scrambling off the pedestal of know-it-all ceramic expert which some might have placed her on. Yet Lana is clearly conversant in the technicalities and artistry of her field. Her fingers move deftly and with intelligence. She’s as comfortable presenting a full day of hows and whys and stories to match as she is forgetting the specific word for a glaze fault. And if the audience can’t supply it, she pops it out sometime later. A clear pro at work.


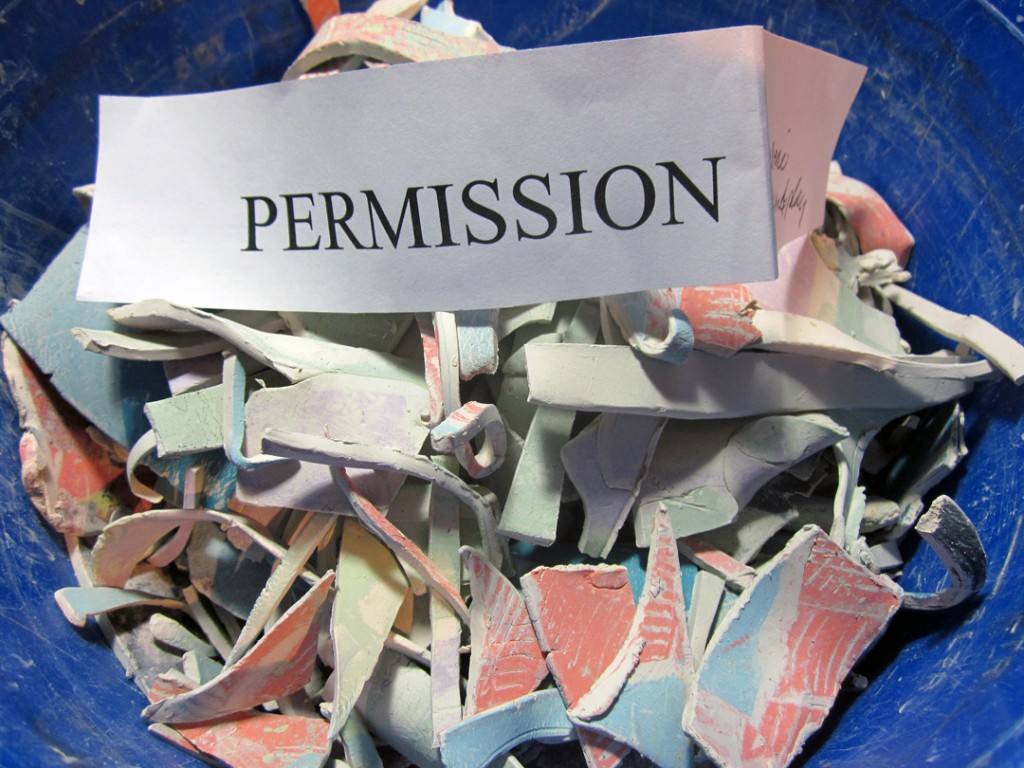
There is no Fourth Wall with Lana, though; you’re in the soup with her.  Pretzel logic. Crazy Wisdom. Magnetic PERMISSION. She actually handed out strips of paper with the word “Permission” on them and invited us to write down what we wanted permission to do or think or try. And voila!, we had the Permission Slip for it. The Queen is benevolent! But about those Low Standards? My guess is that keeping the way into the work accessible unlocks the largest amount of joyful possibilities and provides access for the diverse pantheon of Muses, not just those of Ultimate and Objective Perfection (if they even exist beyond our timidity!) Once we’ve allowed ourselves to play in that way, THEN we can begin to sharpen our skills, get technical, learn from our mistakes, become conversant with how this method works for us.
Back to those slabs!  Here are some things I’ve learned about them when I played around.

Good to Know:

There are all kinds of ways to amend  your patterns while the clay is still flat.

You can add more color if you like, probably not too wetly.

You could stamp light textures, carve lines, or roll thin scraps on top to emphasize areas.

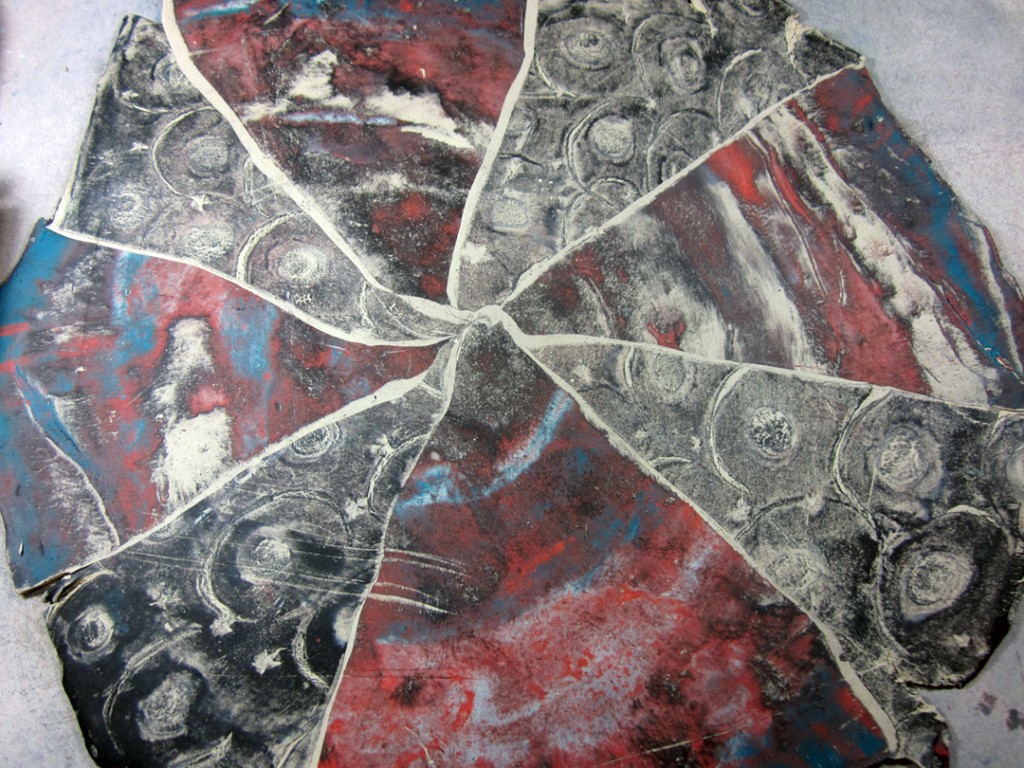
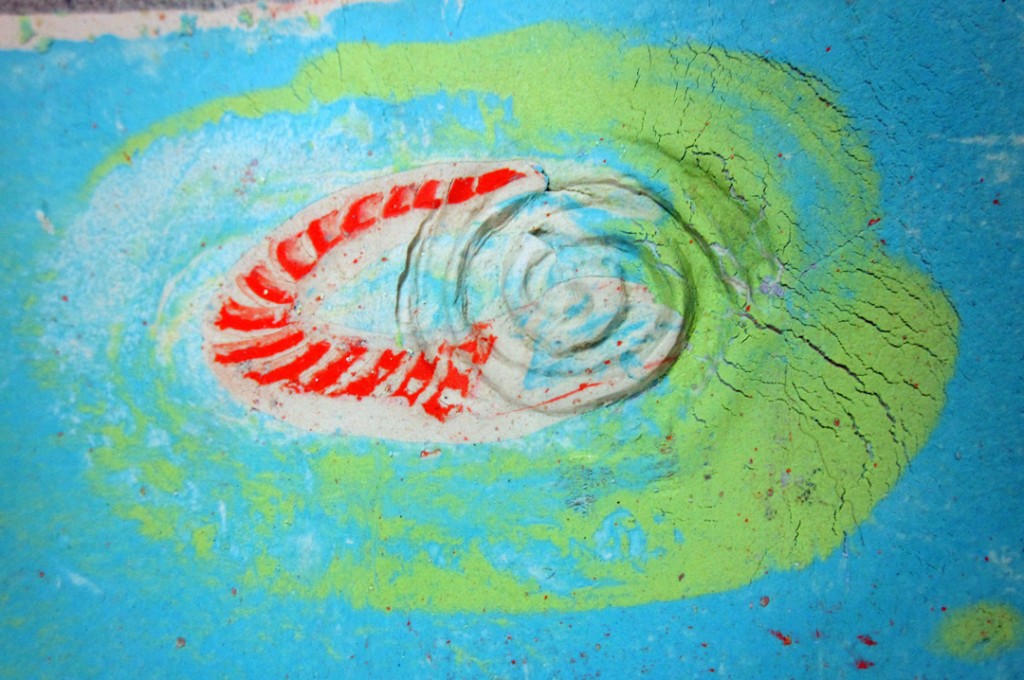
You could even carve out “worms,” turn them over,  switch them around (on both sides!) (Lana’s fun idea; she calls them fossils.)

Rolling your added textures and additions smoothe is a good idea. It sets the designs and creates a unified surface.

There is range of optimum workability when the clay still bends without cracking: pretty darn wet to “mozzarella” hard.

Thinner rolling = more stretching/fading/abrading of colors.

Patterns or templates for your planned creations might be a good idea. Lana used a tile cutter with an ejector!

It’s good to work rather deftly – ala Lana, with a light-handed clarity of purpose. What do you like to do with slabs? Try it!

Simple joins, overlapped or beveled, pressed and perhaps lightly paddled are good. Add water before attaching, if you’re so moved, but that’s it.

You might need to support your creations’ seams and walls until they set up.

Excess handling, too much water or tooling, fussy appendages: all impact the still-damp patterned underglaze and can smear, erase and create an overworked feel.

You can paint bare cut edges, say at the top of a cylinder, with a line of underglaze to complement your marbling. Lana showed us black edges which are snappy.

Alternatively, make some very thin strips and create a rolled edge. Attach with water, press well.

Dry slowly, bisque slowly, just ’cause.

You can amend with more color and washes after bisque, when the first colors are set.

Clear glaze, especially a transparent matte, looks great.

I’ve also used colored pencils, Pitt ink pens and clear acrylic satin medium to seal non-functional and purely decorative work.

All your remaining wet clay scraps have interesting new possibilities too.

Enjoy this process and make fun stuff! Happy New!


~Liz Crain, who’s found a jazzy new way to play with clay –  and since her word for 2013 is “Synthesis” is excited to see what comes about when she incorporates it into the vintage faux metal work she’s done for several years now.


Share this:

Love the Slab You’re With, Part One


Sometimes an activity you encounter meshes with your essence and you melt away into it. A friend explains the basic golf swing and just like that you’re sailing the ball 350 yards at the driving range and they’re saying, “It’s not supposed to be that easy!”

You find your bliss in the swimming pool, the computer lab, a knitting circle: all wonderful fascinations.  You sync with what you already know and scaffold from there, unstoppable in your  heedless avidity.

It’s precisely what happened after I spent a Saturday early last November at the Richmond Art Center with ceramics maven Lana Wilson as she demonstrated her method for coloring and collaging clay slabs and then making stuff out of them. It’s fresh and fabulous and lets the clay be clay and me be me.

When I returned to my studio and fooled around, working from my woefully unreadable notes and her handout, I was simultaneously back in Ceramics 101 trying to wrangle wet-out-of-the-bag clay and was also thrust forward into the freshest color and design possibilities I’ve seen in years. It was unadulterated infatuation and I could not stop my hands.

A bag and a half of clay later (37.5 pounds!) I’ve come up for air. Wow.

This method is clearly about staying in the moment. Loosely intentional. Intentionally loose. Don’t be fooled, though, it’s not necessarily easy. Even though Lana calls herself “The Queen of Low Standards, ” I will explain why that’s a canny ruse in the Part Two post. In the meanwhile, Part One will cover the slab-making.

The Black Side

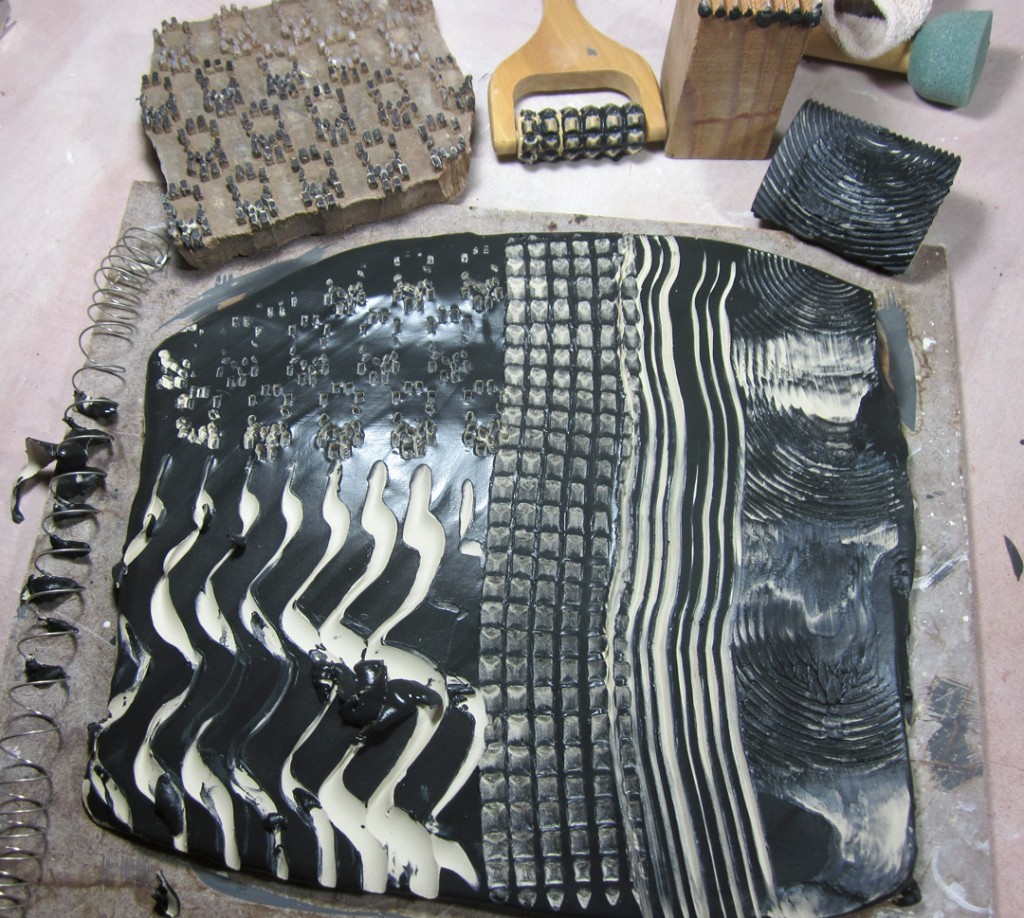
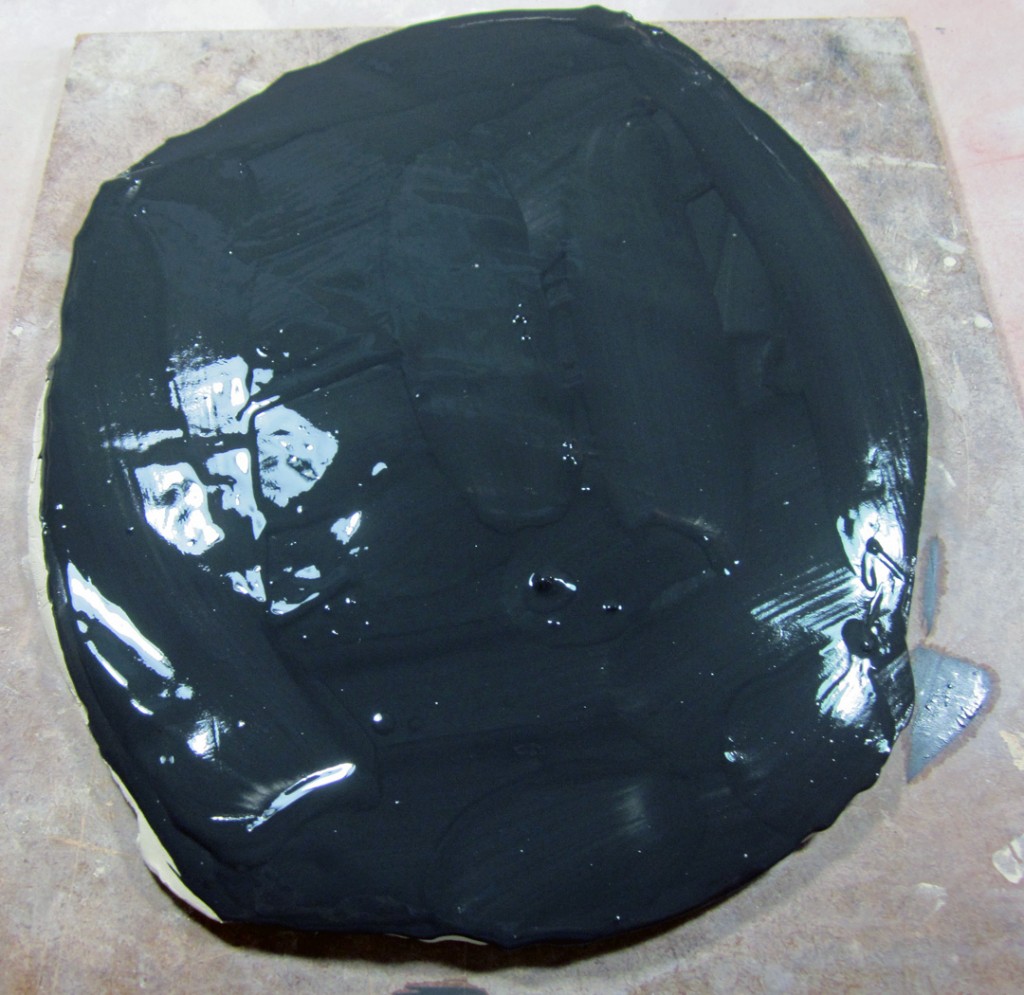
Take a bag of clay  -a white clay is used here, but there are no rules, you get to decide what you like – slice off thick 1″ or so slabs from the long end and throw them down on your working surface sideways to stretch and thin them,  some or a lot, you decide. Or alternatively roll them out on the slab roller. Paint with 1-3 coats Black underglaze,  letting each coat get ‘unshiny’ before applying the next and brushing in alternating directions for evenness.


I need to tell you black is not required! Feel free to use any color(s) you enjoy!


When you’ve got enough coats and they’ve nearly dried, try a bunch o’ textures. You know what you like. My favorite from this array was the squares/alligator roller tool (a tenderizer?) but all of them were pretty wonderful, because they retain their character when they’re manipulated, which is coming.


The Colors Side

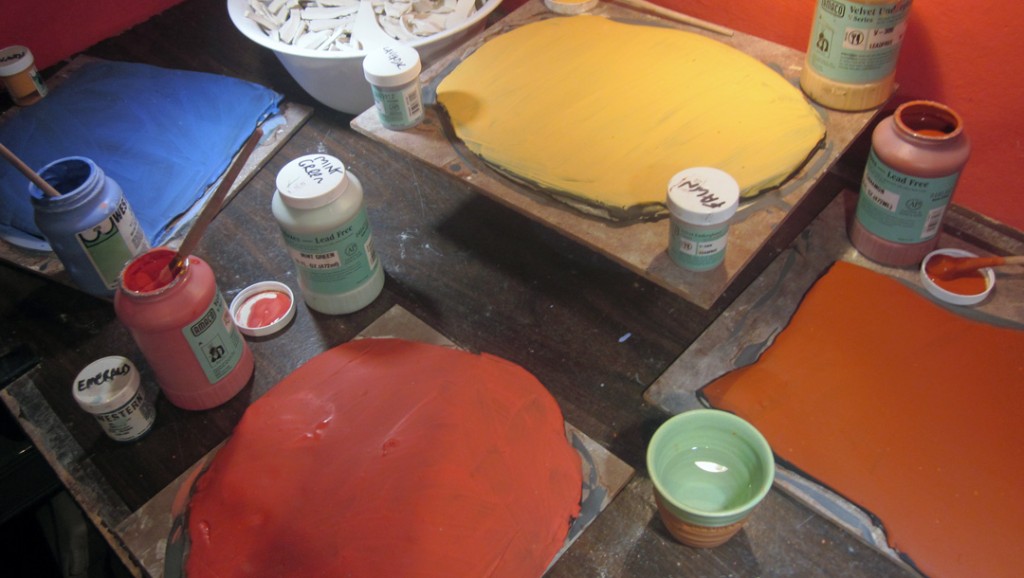
When your Black Side has set up enough, (or even not…..random markings and unmarkings are most welcome) flip everything over and pick out some underglaze colors to play with.  One to three  coats again, maybe not all the same, depending on what you think you might do for patterning in the next step. You don’t necessarily need to know anything about where you’re headed, though. Adventures for everyone!


I want to speak to the Controlling Ceramics Perfectionists in the audience – and you KNOW who you are: this process is worth the price of being messy and unclear. (What you might think is evidence of Low Standards is actually a wicked plan for unexpected beauty.) There is no possible way to make a mistake here, so own it: goofs are in your head. You are officially freed from your need to get it right because there is no wrong. OK, end of message.

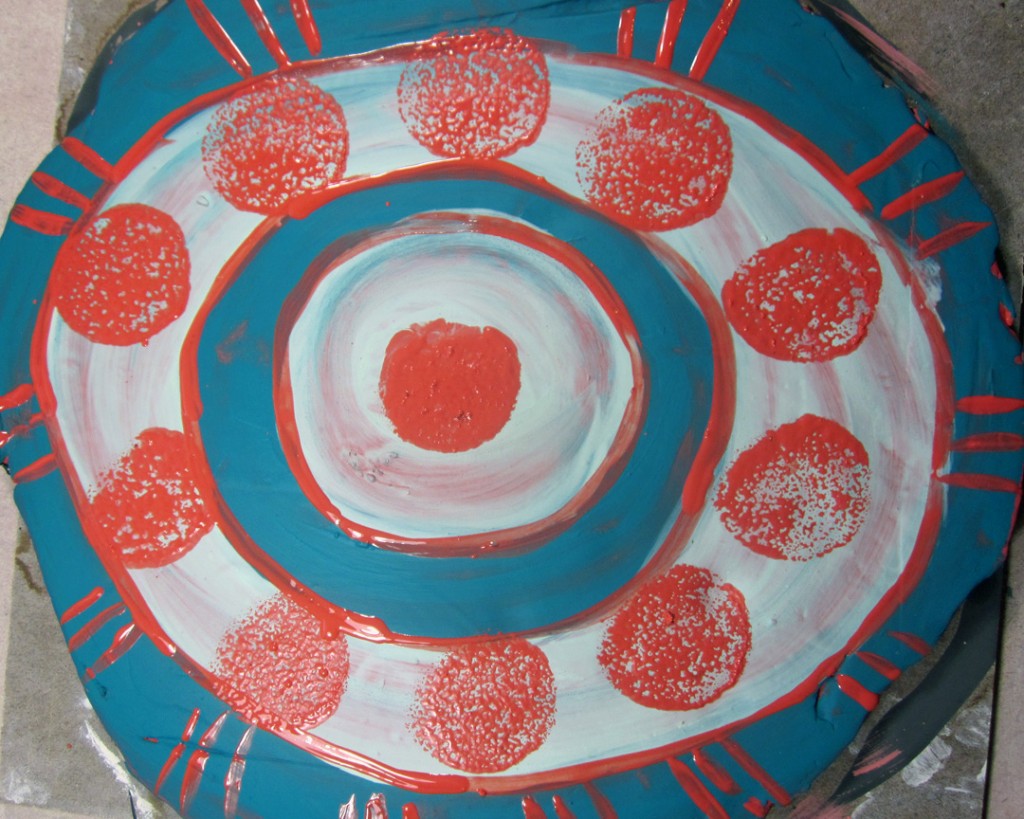
Now, add more colors, thickly or thinly, with or without patterns. Know that they will change mightily as you work, so you don’t need to commit or invest or even pay exact attention. On this slab, I was playing with round, target-like circles and complementary colors, that’s all.


You can also do more texturing and carving as in the black side….I just didn’t here.


Tossing and Rolling

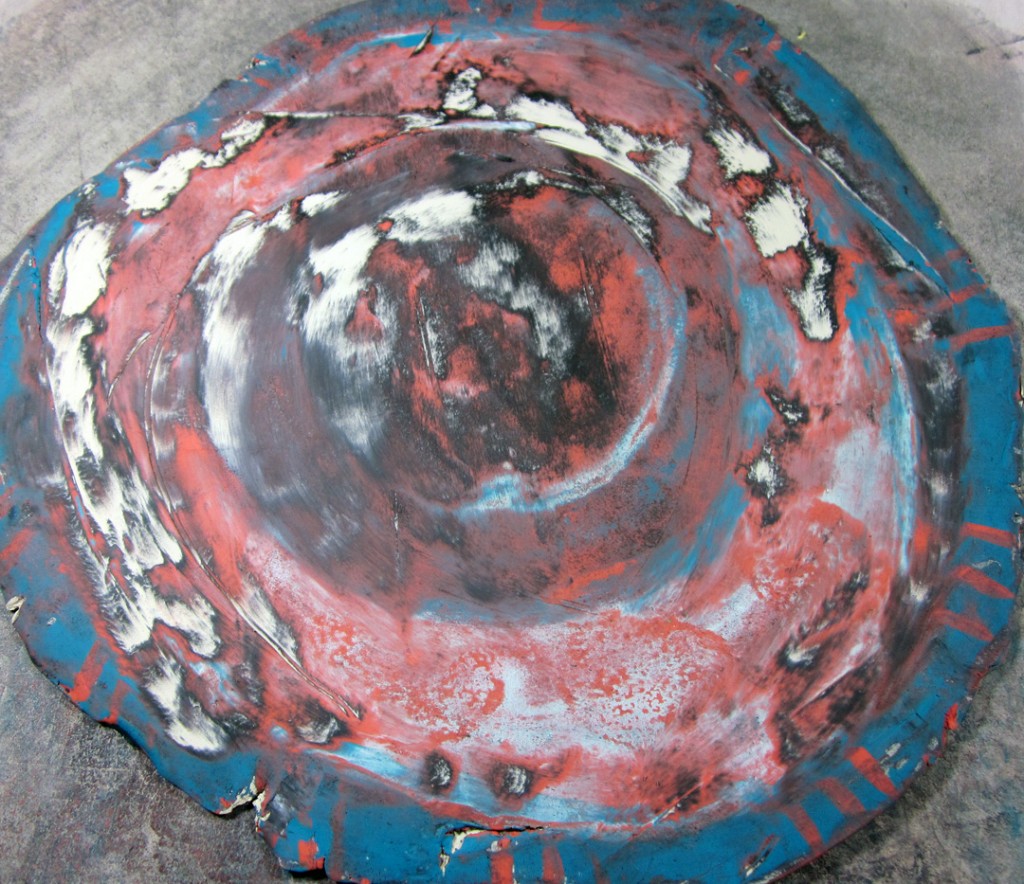
Yes, this is the same slab as the last photo! Gone are my precious quasi-intentional markings.  I threw it out more on the work surface, and it got abraded and messy, even a little more smeary than I expected. (My next batch of slabs was thinner to start with….so there was less smearing as I thinned them. Good to know.)


You also can use a rolling pin to thin your slab. Lana  used newspaper between roller and slab. I did a little and then did not. The transfer of colors with both the newspaper and roller is interesting. See what you come up with. You still are doing great.


Cutting and Recombining

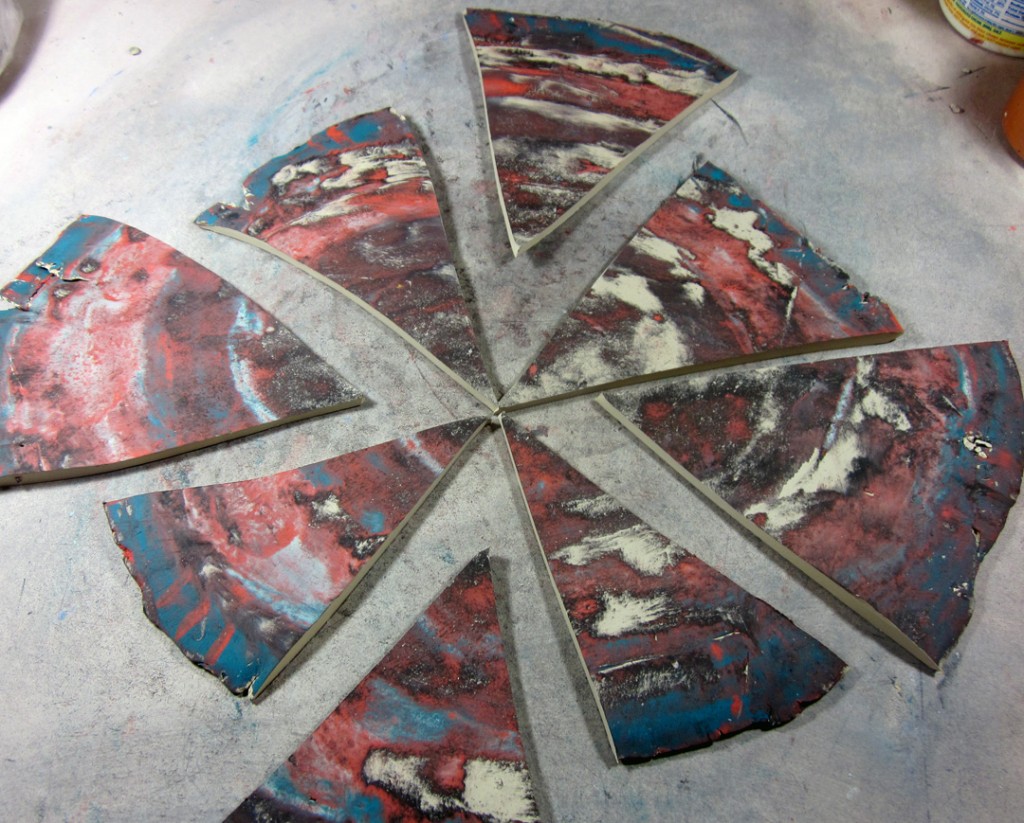
Now it’s time to cut the slab apart and  flip some of the pieces. Cut any old way…this just happens to be pizza wedges, because I’m a radial symmetry aficionado. Try stripes or puzzle pieces. Flip, overlap and roll together again, creating an entirely new collaged slab. The clay itself is still floppy wet and takes to this technique without any resistance. If it got a little dry, just brush each seam with clear water  before rolling.


The parallel scratched looking area on the lower left is from inadvertent markings from my smaller roller and/or handling. if you don’t want that, roll lightly.


Cutting and Recombining Again

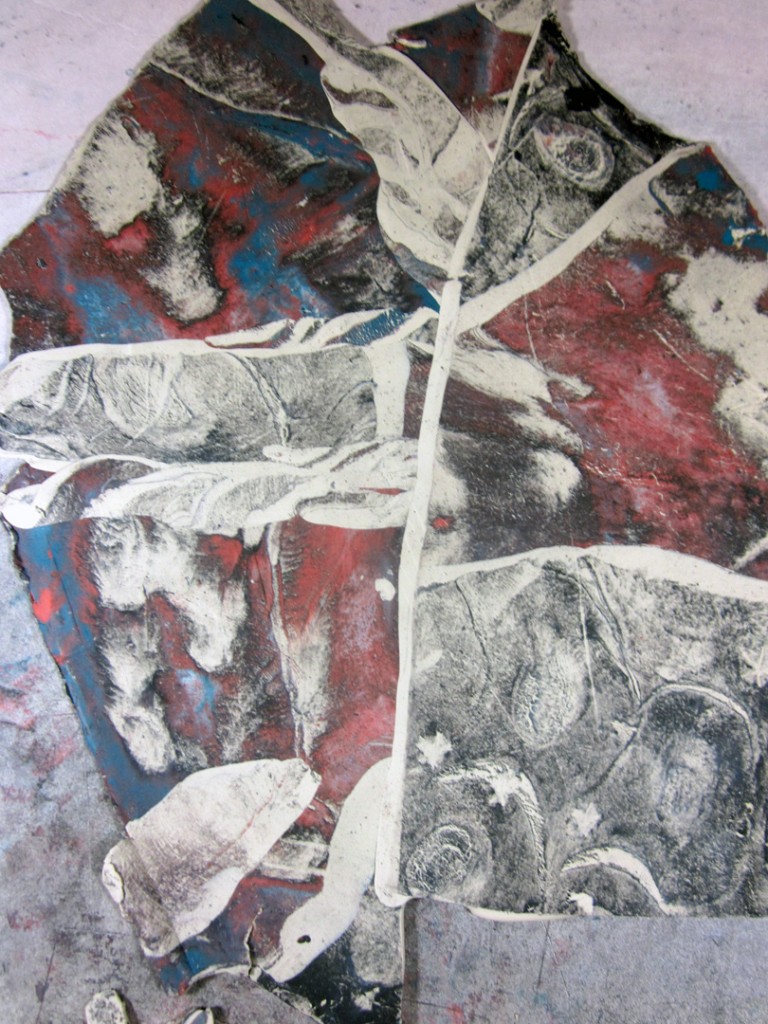
You can stay with the above pizza-like slab, but you are also free to cut/tear and recombine at will. And it only gets better in my book. Here is a variant, including  thin twists rolled flat at a few of the seam areas. It makes the slab absolutely unique each and every time.


This is the first post about this process. Look for a second post on how to form work from these amazing slabs sometime after the new year!

~Liz Crain, who was as surprised as she could be about this new ceramics method and the freedom it afforded her to reinvent herself and her ceramic process, once again.


Share this:

A Frank Look at Money and Venues

The Situation: At some point, Dear Ones, every artist who’d like to “sell” is looking for validation. If someone –  a complete stranger, a friend, or even your mom – gives you respectable money for your precious creations, you cross a line from self-pleasuring hobbyist to validated emerging professional. Just like that. And it feels good.

We won’t go into how squishy and dotted that line is, or how many times you may retreat and re-cross it;  sure, then unsure, than sure again of that validation. It can really mess with your head. Not to mention your work in the studio.

Instead, we’ll fast forward to the place where all the problems you’ve solved in order to stay validated are different now. You’re a Selling Artist. Though you may still and forever be “emerging,” the talking points become more about your niche, your ideal customer, your pricing practices, your product families. Art Biz stuff. Besides making the most excellent and meaningful work you can, where are the optimum places for you to be in order for it to be enjoyed and purchased by those who naturally want what you have and have the means to buy it? Where is the Goldilocks Validation Zone?

That last question will never really go away because it involves the agile art market and your fragile toehold in it.  This applies to us all: I don’t care how big of a name you have or market you roll in, agility and adeptness in responding to change are your trusted allies. You will answer and re-answer such marketing questions until you no longer seek market validation.


The Plot Sickens:

A few Art Soup thickeners here: You’re in charge of this selling stuff, every bit of it. Even if you partner with galleries, co-ops, wholesalers, art groups, agents and tour events, you are the partner too.

No pathway is a sure thing.

Going ONLY after money is a one-way ticket to meaninglessness.

Beware of seeking potential validation, which might masquerade as all-promising flattery and/or “exposure.”  You might lose sight of a venue or event’s viability. (I’m looking at YOU quasi-donation pay-to-play garden party.)


The Frank Look: Until recently, I just ran numbers on my actual sales and actual costs venue by venue or event by event in order to understand whether or not each was profitable. It was good insofar as I was able to compare what has happened over repeated months and years, so I could understand how tweaking all sorts of things (staying agile) impacted the bottom lines. I also know my overall annual income and expenses and net profit. But I sensed dis-parity in my “income streams.” What would help me understand where my efforts approached that GVZ and where was I perhaps not making the best use of my time and troubles, or, heavens, where was I spending money on an illusion (and going in the red to do it?)

The key to creating The Frank Look is to leave the world of real sales numbers and just suppose the same gross sales across the board. I started with a flat $2000 in annual sales, so let’s look at that, venue by venue:

Traditional Gallery: No out of pocket expenses.   Commission 50% = $1000.  NET: $1000.

Vanity Gallery: Upfront Monthly fees $48  x 12 = $576.  Commission 15% = $300. NET: $1124

Co-op Style Gallery: Annual Membership = $50. Entry Fees: 4 exhibits x $45 = $180.  Commission 25% = $500 NET: $1270.

But, wait, while the Co-op looks to be the most lucrative of our galleries,  there are soft costs which must be taken into account: namely the volunteer time required to “sit” the gallery and the travel expenses specifically associated with that task (not in getting the work delivered/picked up.) Even if I value that time at a ridiculous $10 an hour, it plays out like this:

Hours to Gallery Sit: 72 x $10 = $720  Travel: 12 x $5 = $60. ADJUSTED NET: $490

So ya gotta ask about the Opportunity Cost of lost studio time as well as applying a more appropriate hourly rate. Seems to me the news only gets worse for the Co-op Style Gallery.


Let’s look outside the galleries. Applying the same flat $2000 sales to shows and art tours….

Regional  Outdoor Show: Costs, including fees, commissions, mailings, transportation, volunteer and booth sitting time = $981.  NET: $1019

Local Outdoor Show: Cost, including fees, transportation, volunteer and booth sitting time = $361.  NET = $1639

Major Art Tour: Costs, including fees, mailings, postcards, volunteer and selling time = $810.  NET: $1190.

That Local Outdoor Show wins: no travel expenses, lower fees, NO commissions.


Are you still with me? Because there’s more.

What’s my Downside Risk?  What if I had ZERO sales?

Traditional Gallery: COST = $0

Vanity Gallery: COST = $576

Co-op Style Gallery: COST = $1010

Regional Outdoor Show: COST = $681

Local Outdoor Show: COST = $361

Major Art Tour: COST = $810

Sorry, Co-op. Yay for Local Outdoor Show! Very respectable, Traditional Gallery.


These numbers are telling me a clear story about comparable and true costs. I ran them for $1000, $3000, $4000 and $5000 sales figures. with no unexpected variations. The themes were the themes. The good got stellar. The not-so-good  dwindled and rotted as other factors came into play.

Most important other factor: the likelihood of selling a certain amount or not. Some venues are undeniably hampered in that regard, others are nearly unlimited in potential, some need to prove themselves.  It’s also fair to consider such things as: In which of these venues do I feel at home? Am I treated fairly and professionally? Is my work given a spotlight? Which of them takes less physical/creative energy to maintain? Which are better for my relationship to my collectors?

It all goes into the hopper, and armed with both The Frank Look numbers and my horse sense about where things go well, I can better determine where  that Goldilocks Validation Zone is now and in future possible exhibition venues or events.

~Liz Crain,  an artist who tries to squeeze meaning out of every effort, whether sublimely creative or calculatedly analytic, yet knows all will be well regardless.


Share this:

Making A Press-Molded Wad Pot, A Pictorial/Instructional Essay

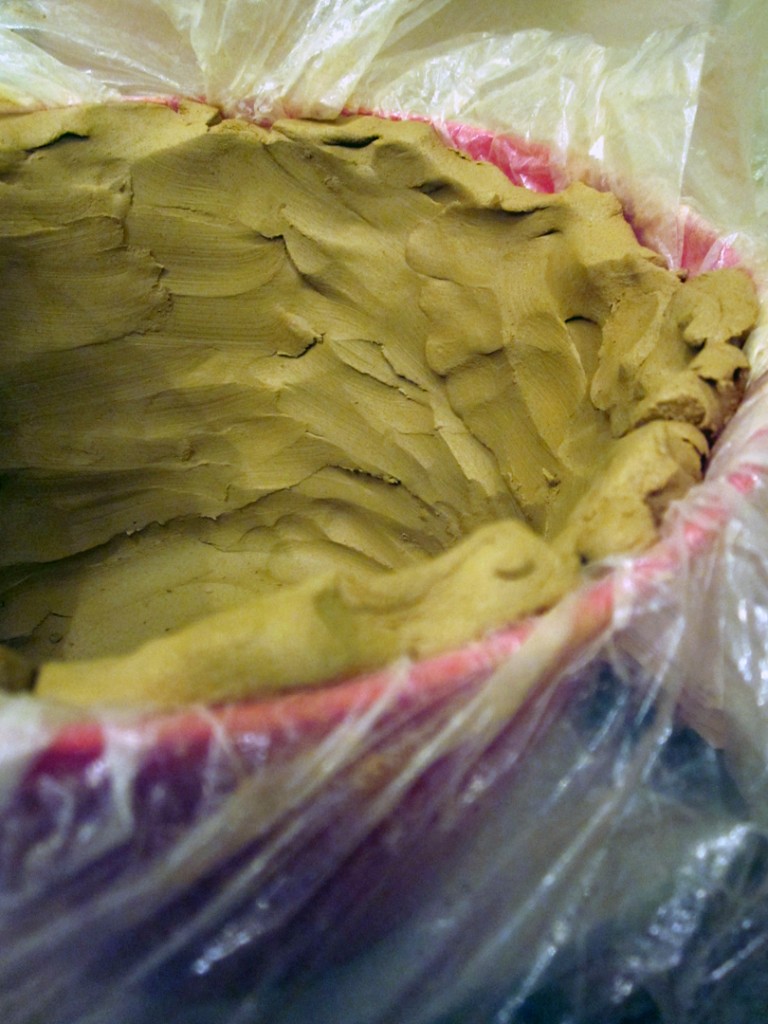
Oh boy! Wet clay, fresh out of the bag! The smell of it reminds me of vacations by Sierra lakes and rivers. Decomposed granite, water and rotting organics, mmmmmMMM!  This bag of lovely Sandstone Buff is from Quyle Kilns in the California Motherlode town of Murphys, so my nose is right on.

Fresh clay like this is sticky, mushy and makes great slime if you get it wetter. It takes any impression, any shape and, if it’s not piled too high or too thick – or if it’s supported – it holds as it dries. We’re not sure just how humans began to take advantage of the fact that clay changes in the fire,  but we know  that raw clay lined many Neolithic holes in the ground or baskets, the world over, and accidentally got baked hard. This particular feature of wet clay is a not-so-hidden agenda in the Beginning Ceramic Handbuilding class I’m currently teaching. First Project, after all the intros, handouts, clay studio tour and ground rules? The Press-Molded Wad Pot.

Forgive me a few more words and then onto the eye candy.

This way of using fresh clay is so obvious it’s almost NOT a clay handbuilding Official Method. At best it gets a sidebar or an “Also Try This” mention in the dozens of  books and websites I consulted for deeper understanding. Sometimes that mention is in the Coiling chapter, sometimes in the Slab working chapter. It doesn’t really get respect.

It deserves better and I’m giving it that because it’s a fabulous and supportive (pun intended) way to get comfortable with the forming properties of clay besides making lumpy mudpies. It  lets clay be clay and learners be learners. It directs attention to good clay skill-building: evenness, surfaces, top edges and drying, but keeps some training wheels on to help a thoughtful ceramic artist have the full experience AND a successful result. Here’s a pictorial walk through the only thing I’ve ever heard it called besides simple press molding: A Wad Pot.


Get yourself some wet clay, about 5 pounds, any kind. Find a container with an even top rim, without undercuts – so your pot or bowl will slide straight out of it and not get caught – like this “Popcorn Bucket” from the local dollar store. You can also use traditional plaster or wood slump molds. You’ll need  some thin plastic if your container isn’t made of something porous that will release the clay. Gather a few rounded sticks or spoons as smoothing devices besides your fingers. And start in.

Open that bag of clay and inhale deeply, just because. If you need to, line your mold with the thin plastic. Don’t worry about how wrinkled or folded it is, that’s part of the texture the finished pot will enjoy. (And a little secret: you can remove this wrinkling later by smoothing the outside if you’re called to it.)

Grab a random-sized pinch of clay, maybe the size of a golf ball. Mush it around (aka: kneading). Pat it into a flattened shape,  1/2″ or  less thick and place it at the bottom of your mold. Do this over and over, lining the bottom and sides of your mold. Pressing the edges of each piece into the others, smoothing and linking the surface only as much as you want. Feel where the thick and thin places are and adjust accordingly. You will go back over it all when the mold is completely lined.

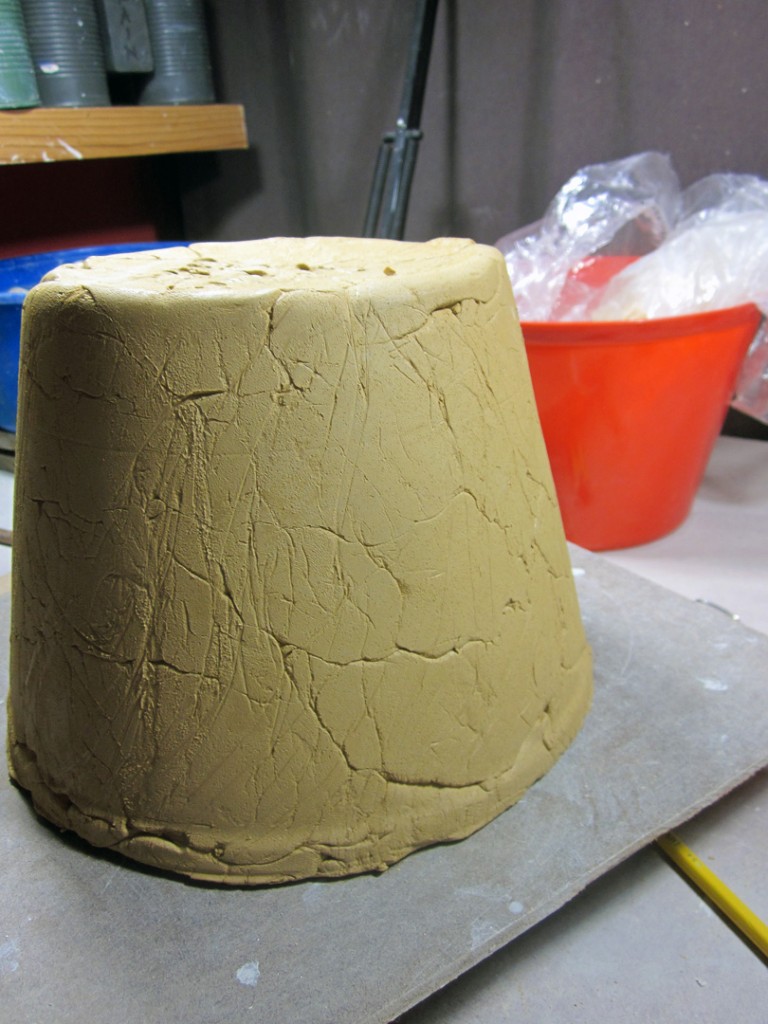
So, fast forward to a finished top rim edge, smoothed and strengthened, a bit of drying and an un-molding. Here’s what you’ve got:


See all those great creases and wrinkles? Leave them alone for a great natural surface…or smooth them with a rib if you must. Press the bottom in a little so it will sit evenly and sign it.

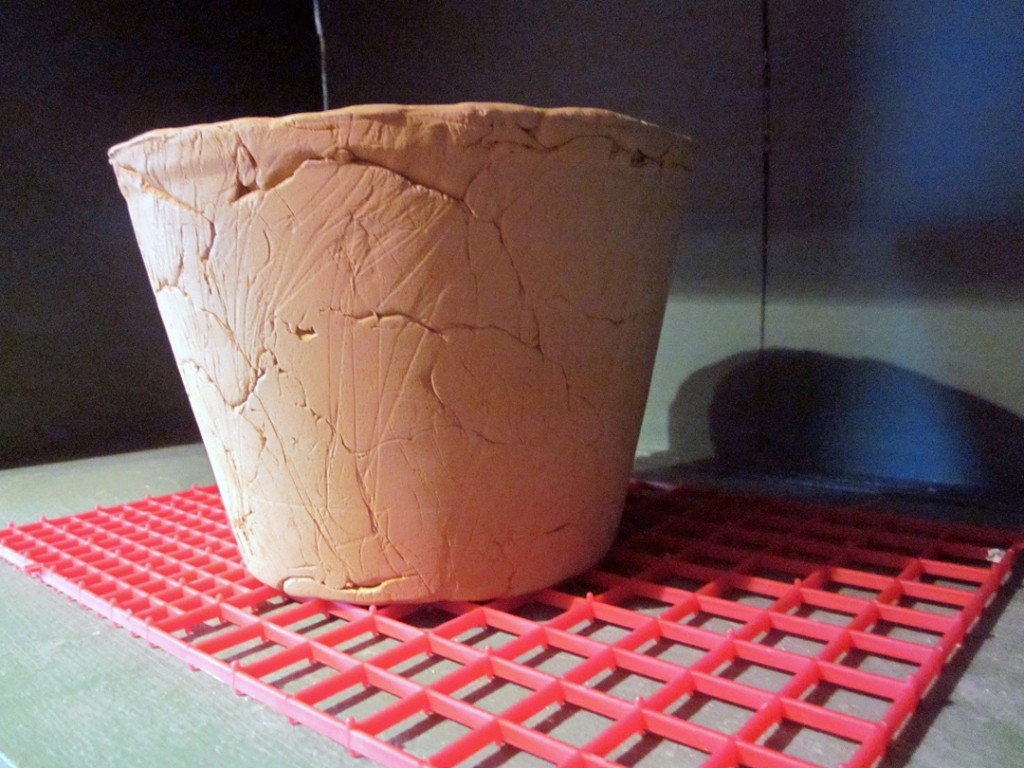
I’m thinking you left the outside alone, so here’s the bisque fired version, wrinkles intact.


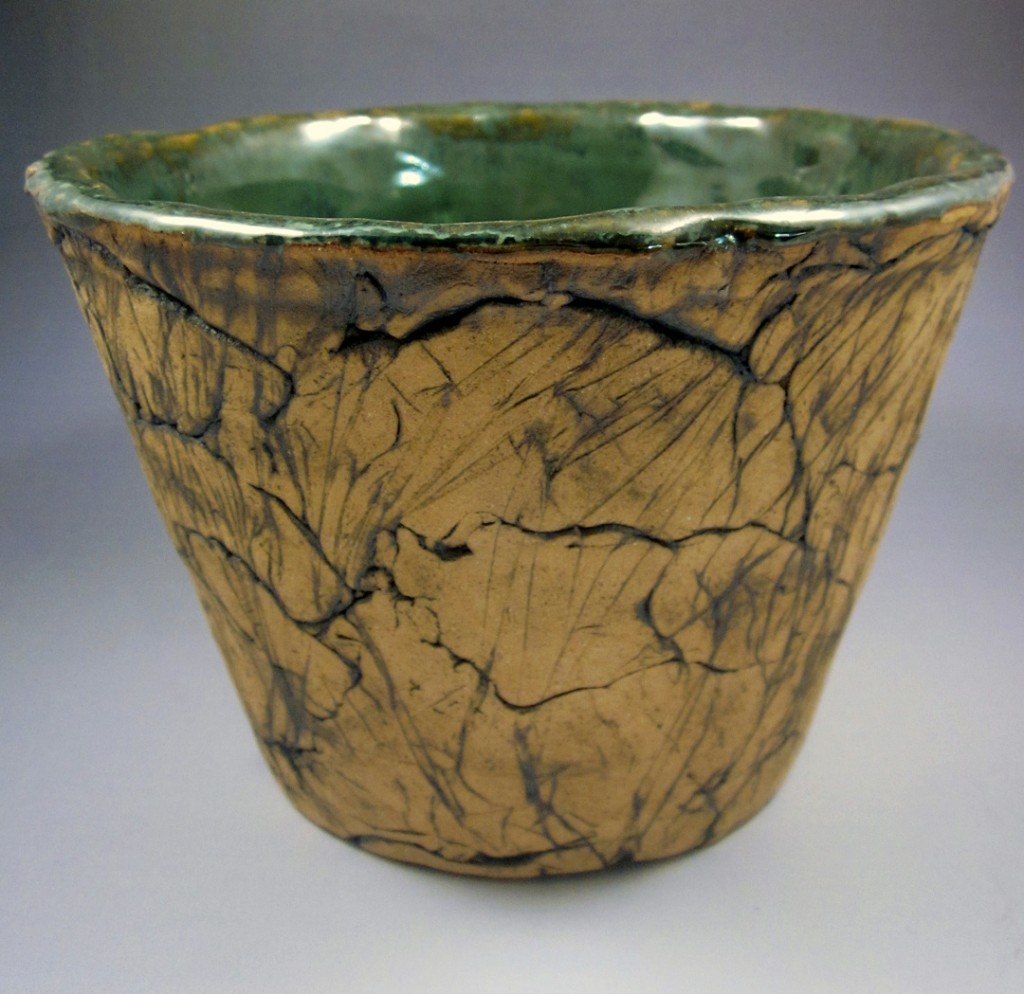
What serves to decorate this kind of pot and honor it’s hard-won (or is it hard-left-alone?) surface texture? How about a patina wash: thinned iron oxide wash brushed on and then lightly sponged off to leave it mostly in the cracks? It’s OK to glaze the smooth inside if you like. And that would look like this:


So, there you have it. An awesome and supportive first project for beginners….or anyone else needing a fairly assured way to make a pot. And quickly!

Variations are legion. Use different mold shapes. (Just make sure your clay will release easily.)  Use evenly rounded wads or coils or “floils” – flattened coils. Smooth the outside cracks. Add stuff to the top rim. Change the shape of the pot once it’s unmolded: square it up, push out from the inside, you know what to do. Don’t smooth the inside as much. Add handles or a top rim edging. The beat goes on.

As I finally get to posting this, my class is 2/3 over and going quite nicely. The second and third projects: Traditional Coiled Pueblo Pots and Pinched Japanese Style Teabowls have been introduced and students are working to finish and decorate to suit. More on the rest of the whole experience soon, of course.

Happy Clay Trails.


Share this:

It’s Complicated: Distilling 30,000 Years of Ceramic Art into a Six-Week Beginning Handbuilding Workshop

OK yes, that title is a tad dramatic. But it’s not a needy and exaggerated untruth: I’m actively sorting and defining what I know and enjoy about the entirety of ceramic arts in order to hone in on the heart and soul of this Beginning Handbuilding class, taught by me,  starting at the end of this month.

And this week that honing process hit critical mass. It felt a little like peeking into a ramping raku kiln and watching for the powdery glaze on the pieces to liquify, come to a bubbling boil and then to smooth out again as both it and the ware it is coating becomes blastingly red-hot. And THEN comes the moment to shut off the gas and pull the pieces with tongs into their garbage can reduction chambers. Most of you ceramicists out there will understand this reference, but if you need a visual, here’s a good one.

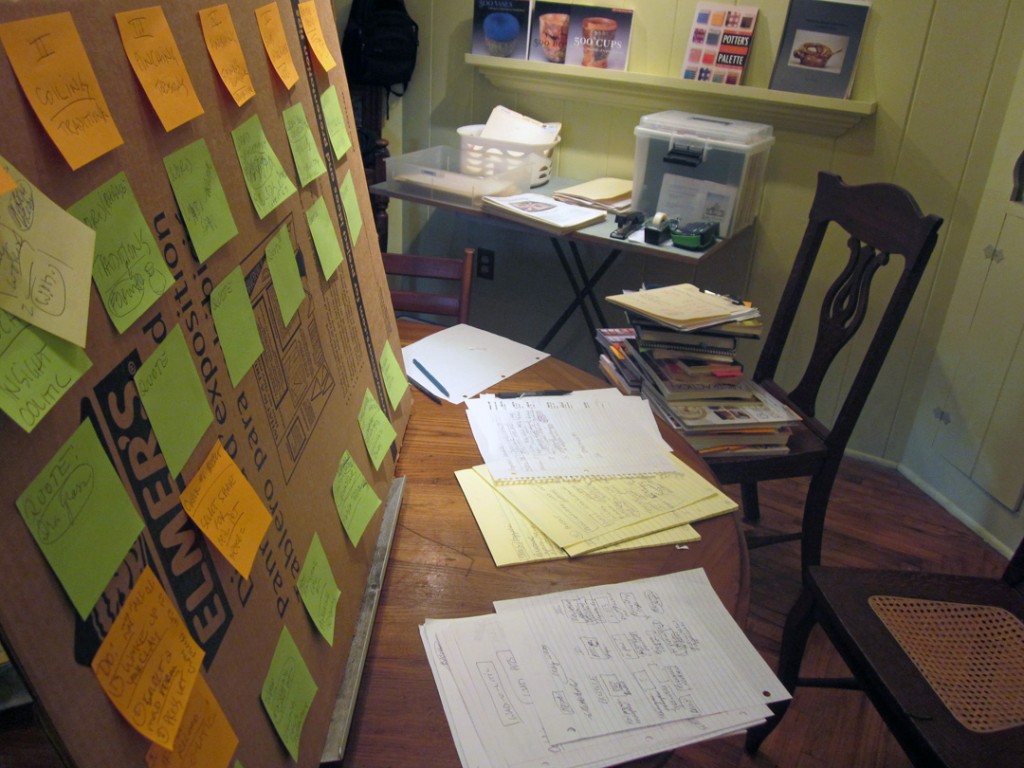
All this week I gathered and listed and piled and flagged.  I re-piled and sorted and started a board of sticky notes detailing each project’s intended trajectory through the weeks. I assembled the needed demos, quotes, glossary, Important Things to Know and on and on. I culled (which was clearer and easier now) and kept the best.  A Beautiful Mind got nuthin’ on me!

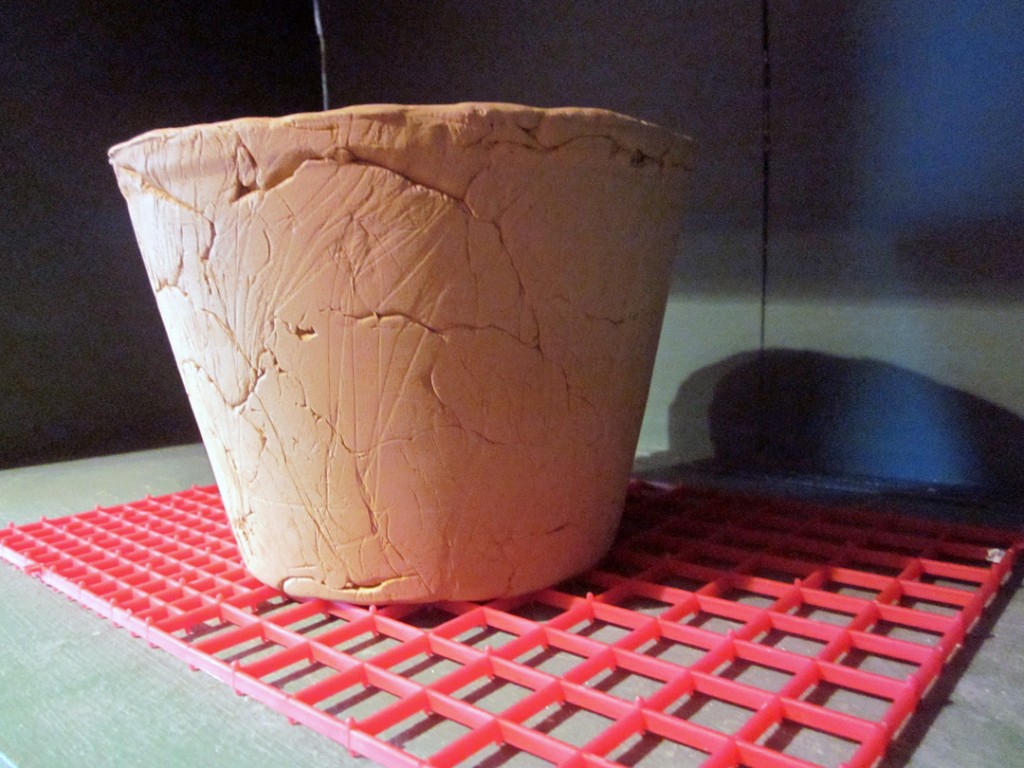
Last post I talked about how this class-formulating process amasses information. I think I mentioned something about comparing the ceramic teaching process  to cooking show demos, but I’m reporting in tonight that I’m not quite ready for that one. Maybe next week. I HAVE made one sample of a Press Mold Wad Pot, which you can see below,  but now I realize it’s the first of several needed to provide tangible illustrations of the important stages of just one of three comprehensive methods and techniques I will be teaching.

Press Molded Wad Pot at leatherhard

And that serves my personal understanding of Full-Service Ceramics. Sometimes students can connect the dots, but I find in ceramics it’s not all that easy. The whole process is un-obvious, far-ranging,  deceptively sidetracking and negotiable.

But that’s also the most important clue for me as as Interpreter and Guide: first and foremost, I need to have a profound and undistracted personal sense whereof I speak. If I gloss over, give the short shrift, make assumptions, it does not do the job in that satisfying way. I think I am connecting my own dots, retrospectively. As a matter of fact, I could re-title this post Things I Wish Someone Told Me Right Away.

And even then, the only way out is by doing it. So while I prepare and attempt to perfect my offerings for my new class and students, ceramics has also taught me to be more comfortable with imperfect and unexpected outcomes. With learners of all ages, that’s nearly a given. Years of helping clay handbuilding students has told me this amount of preparation is no less than the right amount, as cloggy and complicated as it can be. I’m glad it’s ONLY 30,000 years I need to review and condense and, like I said, I’m enriched and privileged to do it.

Class Nuts and Bolts: 6 Thursdays, 2-5pm, Session I: Feb 23 to March 29, Session II(with different techniques, projects and subject matter I still have to formulate): April 12 – May 17 held at the Santa Cruz Mountains Art Center, 9341 Mill Street, Ben Lomond, CA,  831-3364ART.

If you’re so inclined, you can call or register online at www.MountainArtCenter.org. Class is $180 for Members/$200 Non-Members.

Next time: Those visual aids!

Share this:

Crouching Teacher, Hidden Student: Crafting an Excellent Clay Handbuilding Class

Step right up and lookee here: I said YES when the enthusiastic folks at the Santa Cruz Mountains Art Center asked me if I would  be so kind –  and organized! –  as to offer a structured series of Beginning Handbuilding classes. That was a few months ago and now, here they come in just a few weeks. I better get this figured out.

I got thrown into the briarpatch at the outset, because in order to write not one course description but three of them  – Short, Long and For the Press – I needed to have my raw concepts of what these classes would be about aligned with my personal take on the ginormous field of ceramics. Nothing like starting right in.

Just what do Adult Beginners or Re-Newers want? Or need? What do I have to offer them? Could I parse this out and still keep it meaningful, soulful and artistic, for us both?

How much does my editing, formatting and delivery of this wide-ranging subject affect outcomes? I concluded it was puh-lenty and I would do well to start back at my own beginning, boil it down to the bare-boned basics and embellish prettily from there.

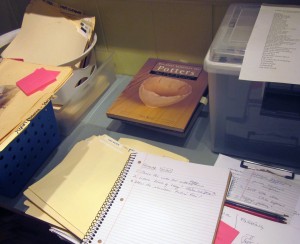
So what you see to the left is my long-time method of distilling knowledge: get a side table, dedicate it to the topic at hand, and proceed over the ensuing unfocused weeks to pile it high with everything which might be valuable to that cause. (It’s also how I wrote my college term papers, so I guess there’s a workable precedent in force.)
Supposedly Right-Brained Creatives respond better to horizontal, visual, tactile piled-up available information – as opposed to vertical files behind cabinet drawer-fronts –  and I agree: when I have a thought, a pertinent quote, a book, an article, a snippet of anything I suspect might be useful, I just throw it here, feeling rich and capable.

In good time, I will comb through the cornucopia and discover the inherent order there. Yes, I have a goal in mind, but the only way I realize it is to plow through and let it grab me. Inevitably the outcome is so much richer and denser than what I thought I was creating.

These stacks are certain to contain my decade-plus collection of notes and handouts from my stable of teachers too. Some of them have had genius ways of simplifying and Explaining It All….or genius techniques, genius timetables, and genius projects which I can freely channel, if not outright copy. I bow to those who gave this kind of effort before me, and I reap the harvest of their cultivation. Nobody comes out of nowhere.

And that’s really all there is to it. I’m no expert. I’m just someone who’s studied how to share and how to be a guide and to deliver substance. I’ve got some ideas on what sorts of things are good to know in the beginning and what sorts of things might logically follow.  I have theories on how to engage learners and how to aid them in discovering their own realizations and about how to foster the creative process as it relates to clay. Beyond that, what happens is what happens and I mean to stay awake to it. I’m a Hidden Student inside a Crouching Teacher.

Class Nuts and Bolts: It meets 6 Thursdays, 2-5pm, Session I: Feb 23 to March 29, Session II: April 12 – May 17 held at the Santa Cruz Mountains Art Center, 9341 Mill Street, Ben Lomond, CA,  831-3364ART.

If you’re so inclined, you can call or register online at www.MountainArtCenter.org. Class is $180 for Members/$200 Non-Members.

Next Time: A discussion of the super slo mo similarities between an illustrated ceramic process and cooking shows.

Share this:

How to Color Your Own Ceramic Aquarium Gravel

Thickening without Glassifying

If you think that generating thousands of just-right tiny chunks of dried clay in order to have ceramic aquarium gravel is madness, you would not be far wrong. But it ends up the rewarding kind of madness, as you shall soon see.

I really did not think this through! But how could I? No one I know and no one they know has done this, so it has been necessarily one foundering discovery after another.

After hand-generating the gravel, those buckets of tiny bisqued chunks need coloring. But glazing them won’t work; the glass-forming ingredients in glaze will simply fuse them in a lump to the kiln shelf. A rookie mistake. Perhaps a nice effect when done on purpose, but for another project. (Hindsight Hint: generate the next batch of aquarium gravel with pre-colored clay and call it done!)

If I couldn’t use glaze, then would mason stains, oxides or underglazes stick well and evenly? The viscosity of underglazes can be thin and take three coats to cover well, but they seemed to offer the strongest color in the easiest format.

At the first try, the bits got too wet and wound up unable to bind with the color. It looked a little like bluish barf: color in a flat puddle punctuated by the pinkish chunks. Dang. I let them dry overnight while I felt a bit queasy over it. I considered the possibility of resorting to acrylic paint….but that thought both freed me and bolstered my resolve to find a fired-on solution.

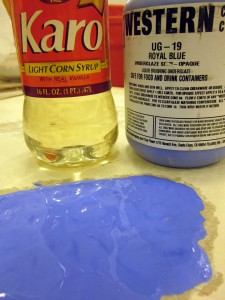
I talked with the deeply resourceful Gail Ritchie and we agreed we needed to add something which would sticky-up the underglaze, but not be glassy in the slightest. We came up with CMC gum fixative, Karo Syrup, honey, maple syrup…..all of which we theorized would help the underglaze attach while it dries and then burn away in the kiln, it’s job done, leaving the gravel in beautifully-colored separateness.

Karo Syrup was handy. Karo worked! Best use for Karo Syrup since homemade popcorn balls.

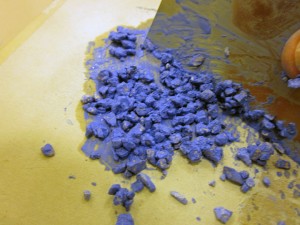
I added a few large drops of Karo to about 2T of underglaze…stirred well, and then mixed in the gravel sample to make a thick and dry-ish sticky mound.

Mixing the Bisqued Gravel with Karo’d Underglaze

For most of my samples, I used a heat gun to gently dry and separate each pile and then handled it as little as possible to avoid knocking off any hard-won color. I left one pile wetter and fully connected, just to see if that mattered…and while every sample fired up evenly colored and separate, the wetness of that one damp batch left a lot of color on the kiln shelf, which I needed to scrape off and re-coat the shelf with kiln wash. It’s worth it to dry things before firing them.

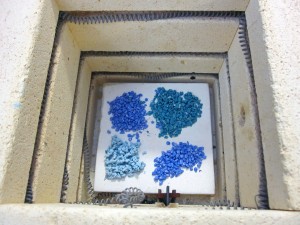
Here’s what the little test kiln known as Sparky looked like when I opened it the next day. So fine!

Lovely little colored piles

Ceramic aquarium gravel-making has been the full creative catastrophe, with a happy ending. I’ve worked harder both physically and mentally and it’s taken scads more time than expected. Ironically, this gravel is only a bit player – pun intended – in the finished ceramic Aquarium Set-Up For Sale piece I envision. In that respect, it’s like fine silk lingerie, something usually only the wearer knows about, but great for self-confidence.

Every speck of ceramic aquarium gravel represents the whole effort to me now and I find I cannot let even one fall off the board or over the edge of the kiln shelf. They’re shards of meaning and intent, like artistic DNA, each carrying the whole idea.

Share this: