It’s Complicated: Distilling 30,000 Years of Ceramic Art into a Six-Week Beginning Handbuilding Workshop

OK yes, that title is a tad dramatic. But it’s not a needy and exaggerated untruth: I’m actively sorting and defining what I know and enjoy about the entirety of ceramic arts in order to hone in on the heart and soul of this Beginning Handbuilding class, taught by me,  starting at the end of this month.

And this week that honing process hit critical mass. It felt a little like peeking into a ramping raku kiln and watching for the powdery glaze on the pieces to liquify, come to a bubbling boil and then to smooth out again as both it and the ware it is coating becomes blastingly red-hot. And THEN comes the moment to shut off the gas and pull the pieces with tongs into their garbage can reduction chambers. Most of you ceramicists out there will understand this reference, but if you need a visual, here’s a good one.

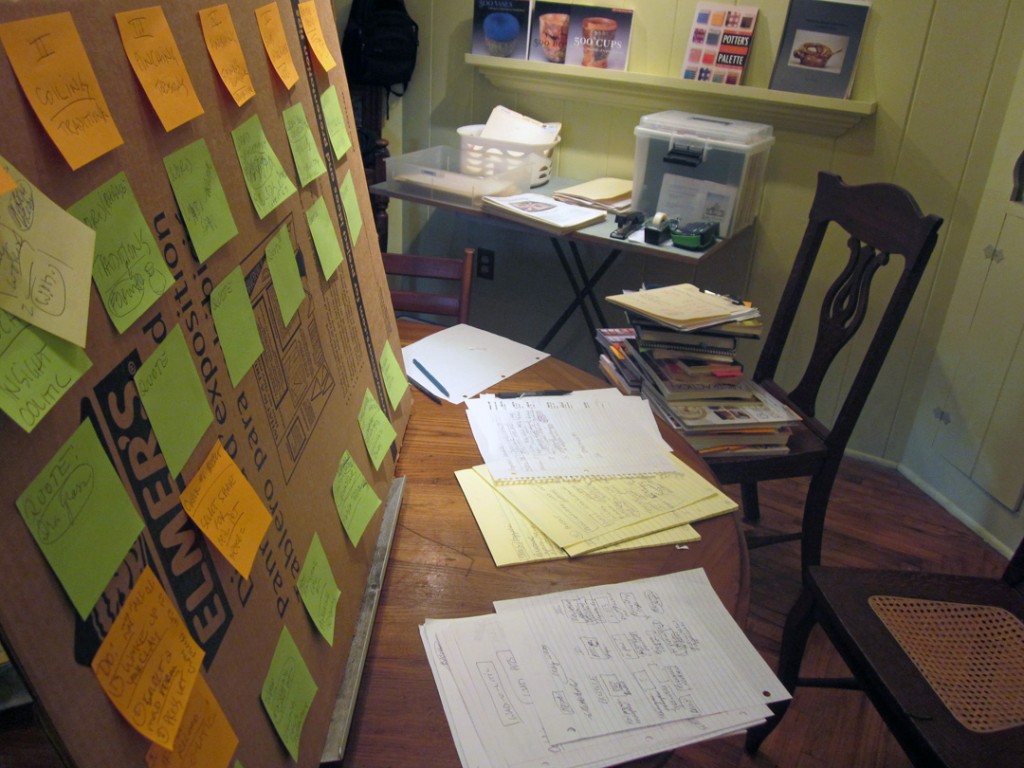
All this week I gathered and listed and piled and flagged.  I re-piled and sorted and started a board of sticky notes detailing each project’s intended trajectory through the weeks. I assembled the needed demos, quotes, glossary, Important Things to Know and on and on. I culled (which was clearer and easier now) and kept the best.  A Beautiful Mind got nuthin’ on me!

Last post I talked about how this class-formulating process amasses information. I think I mentioned something about comparing the ceramic teaching process  to cooking show demos, but I’m reporting in tonight that I’m not quite ready for that one. Maybe next week. I HAVE made one sample of a Press Mold Wad Pot, which you can see below,  but now I realize it’s the first of several needed to provide tangible illustrations of the important stages of just one of three comprehensive methods and techniques I will be teaching.
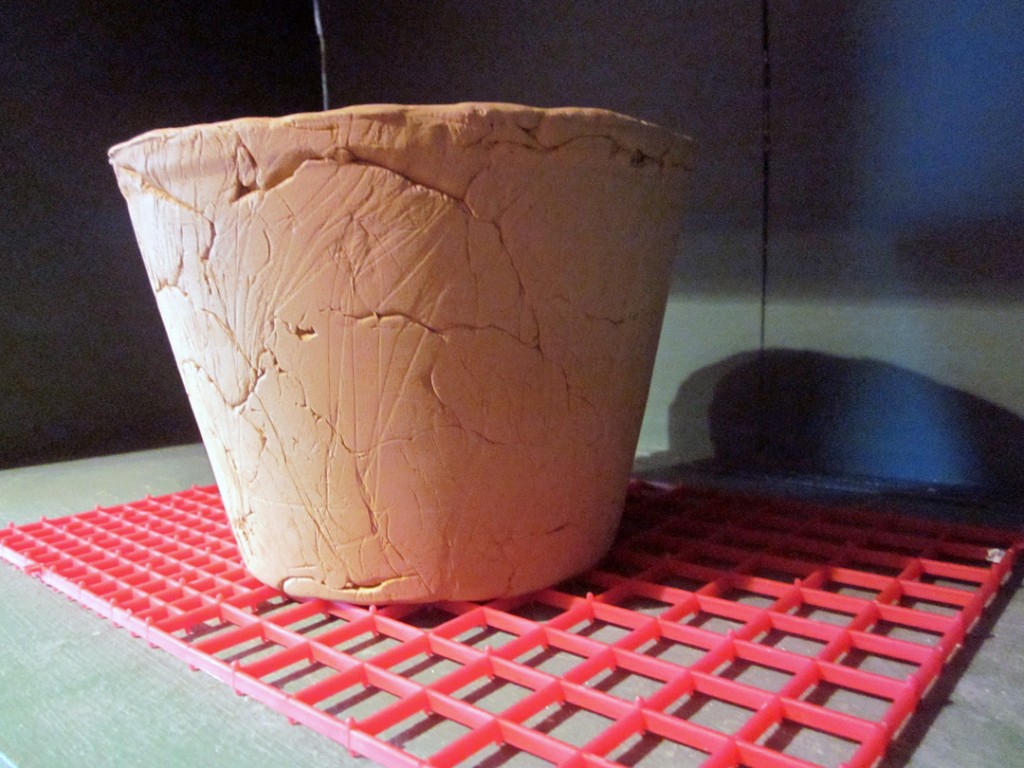
Press Molded Wad Pot at leatherhard

And that serves my personal understanding of Full-Service Ceramics. Sometimes students can connect the dots, but I find in ceramics it’s not all that easy. The whole process is un-obvious, far-ranging,  deceptively sidetracking and negotiable.

But that’s also the most important clue for me as as Interpreter and Guide: first and foremost, I need to have a profound and undistracted personal sense whereof I speak. If I gloss over, give the short shrift, make assumptions, it does not do the job in that satisfying way. I think I am connecting my own dots, retrospectively. As a matter of fact, I could re-title this post Things I Wish Someone Told Me Right Away.

And even then, the only way out is by doing it. So while I prepare and attempt to perfect my offerings for my new class and students, ceramics has also taught me to be more comfortable with imperfect and unexpected outcomes. With learners of all ages, that’s nearly a given. Years of helping clay handbuilding students has told me this amount of preparation is no less than the right amount, as cloggy and complicated as it can be. I’m glad it’s ONLY 30,000 years I need to review and condense and, like I said, I’m enriched and privileged to do it.

Class Nuts and Bolts: 6 Thursdays, 2-5pm, Session I: Feb 23 to March 29, Session II(with different techniques, projects and subject matter I still have to formulate): April 12 – May 17 held at the Santa Cruz Mountains Art Center, 9341 Mill Street, Ben Lomond, CA,  831-3364ART.

If you’re so inclined, you can call or register online at www.MountainArtCenter.org. Class is $180 for Members/$200 Non-Members.

Next time: Those visual aids!
Share this:

Crouching Teacher, Hidden Student: Crafting an Excellent Clay Handbuilding Class

Step right up and lookee here: I said YES when the enthusiastic folks at the Santa Cruz Mountains Art Center asked me if I would  be so kind –  and organized! –  as to offer a structured series of Beginning Handbuilding classes. That was a few months ago and now, here they come in just a few weeks. I better get this figured out.

I got thrown into the briarpatch at the outset, because in order to write not one course description but three of them  – Short, Long and For the Press – I needed to have my raw concepts of what these classes would be about aligned with my personal take on the ginormous field of ceramics. Nothing like starting right in.

Just what do Adult Beginners or Re-Newers want? Or need? What do I have to offer them? Could I parse this out and still keep it meaningful, soulful and artistic, for us both?

How much does my editing, formatting and delivery of this wide-ranging subject affect outcomes? I concluded it was puh-lenty and I would do well to start back at my own beginning, boil it down to the bare-boned basics and embellish prettily from there.

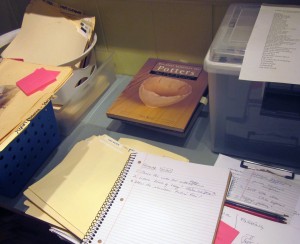
So what you see to the left is my long-time method of distilling knowledge: get a side table, dedicate it to the topic at hand, and proceed over the ensuing unfocused weeks to pile it high with everything which might be valuable to that cause. (It’s also how I wrote my college term papers, so I guess there’s a workable precedent in force.)
Supposedly Right-Brained Creatives respond better to horizontal, visual, tactile piled-up available information – as opposed to vertical files behind cabinet drawer-fronts –  and I agree: when I have a thought, a pertinent quote, a book, an article, a snippet of anything I suspect might be useful, I just throw it here, feeling rich and capable.

In good time, I will comb through the cornucopia and discover the inherent order there. Yes, I have a goal in mind, but the only way I realize it is to plow through and let it grab me. Inevitably the outcome is so much richer and denser than what I thought I was creating.

These stacks are certain to contain my decade-plus collection of notes and handouts from my stable of teachers too. Some of them have had genius ways of simplifying and Explaining It All….or genius techniques, genius timetables, and genius projects which I can freely channel, if not outright copy. I bow to those who gave this kind of effort before me, and I reap the harvest of their cultivation. Nobody comes out of nowhere.

And that’s really all there is to it. I’m no expert. I’m just someone who’s studied how to share and how to be a guide and to deliver substance. I’ve got some ideas on what sorts of things are good to know in the beginning and what sorts of things might logically follow.  I have theories on how to engage learners and how to aid them in discovering their own realizations and about how to foster the creative process as it relates to clay. Beyond that, what happens is what happens and I mean to stay awake to it. I’m a Hidden Student inside a Crouching Teacher.

Class Nuts and Bolts: It meets 6 Thursdays, 2-5pm, Session I: Feb 23 to March 29, Session II: April 12 – May 17 held at the Santa Cruz Mountains Art Center, 9341 Mill Street, Ben Lomond, CA,  831-3364ART.

If you’re so inclined, you can call or register online at www.MountainArtCenter.org. Class is $180 for Members/$200 Non-Members.

Next Time: A discussion of the super slo mo similarities between an illustrated ceramic process and cooking shows.

Share this:

“Apparently We’re Not Fish People” A Super Brief Photo Essay

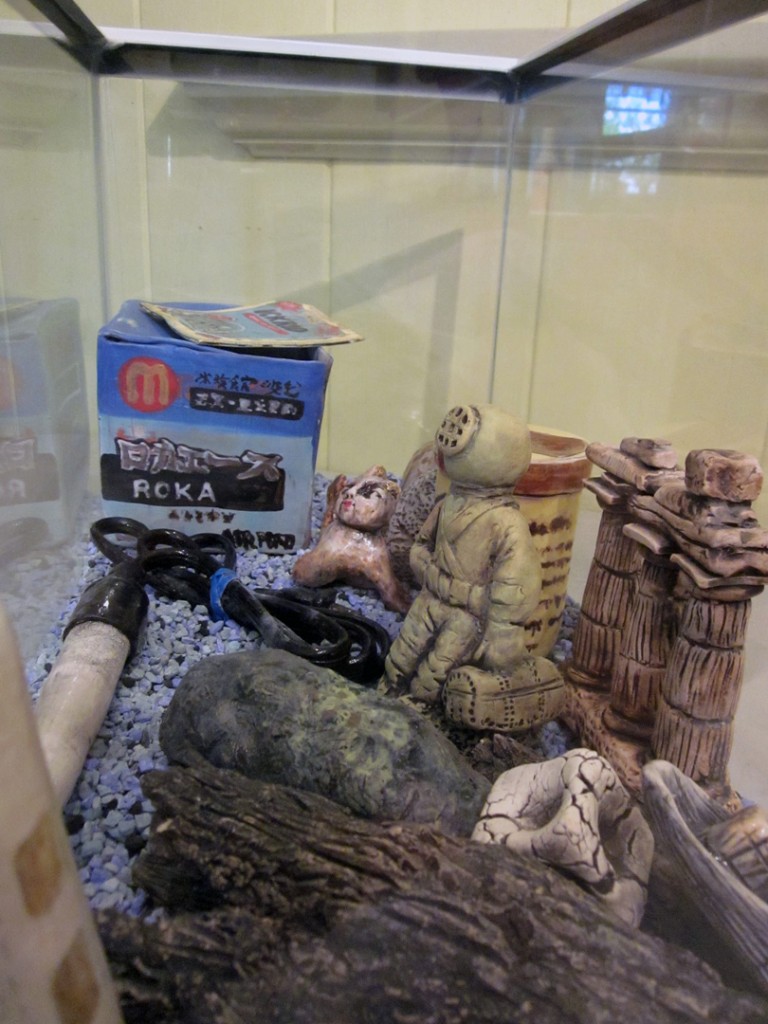
This is the only kind of aquarium I really like ~Liz Crain

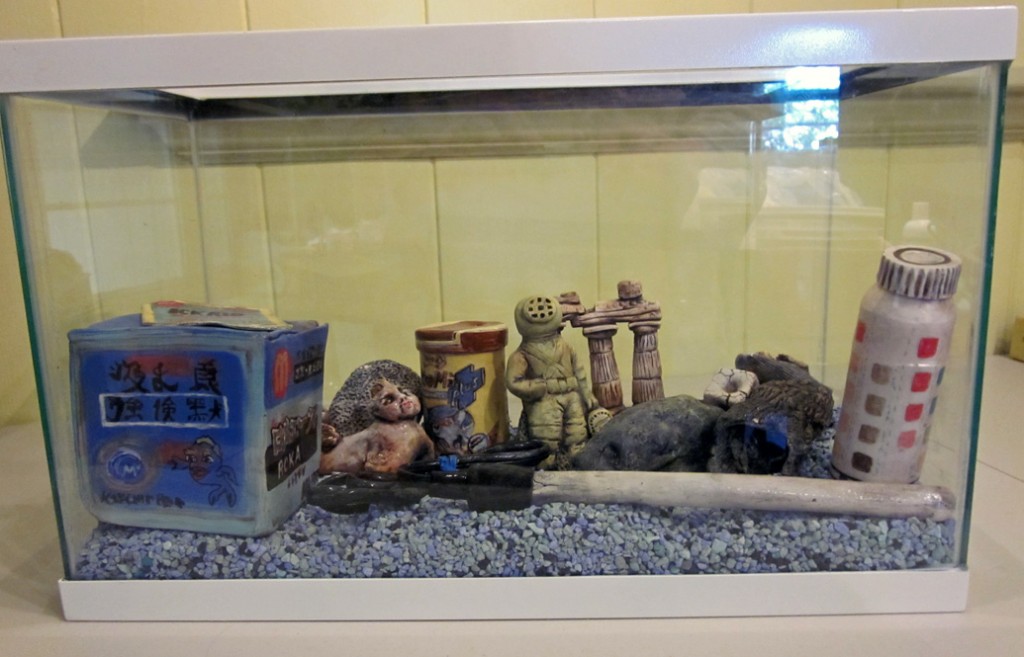
“Apparently We’re Not Fish People” is the title of my finished ceramic aquarium piece in the photo above. It’s all ceramic except the actual glass/plastic aquarium.

You may remember my earlier posts about making ceramic aquarium gravel. It was for this piece, and not a live aquarium!

Since those posts, I’ve made the super funky retro diver, the precious merbaby, and wrecked columns, the small Asian boat, rocks, shells and logs. Also the Japanese pump box, old school heater and cord, Tetra Min food cannister, Ph test strip bottle and Ick Rid sample envelope.

It’s all done in time to travel to the California Conference for the Advancement of Ceramic Art (CCACA, pronounced SEE-KA’-KA) in Davis, CA this weekend. It will be a small part of Cabrillo College’s outdoor installation entitled “Hard Times.” Photos of THAT coming soon.

I’m completely taken up with the rest of the preparations for not only the Davis conference, but for my first foray into selling my work at an outdoor ceramics show and sale with the Santa Cruz Clay folks at Bargetto Winery in Soquel. It’s packing and pre-packing all the time now…..Day trip to Davis Friday, then Saturday and Sunday in my booth in the Santa Cruz Spring sunshine.

So, off I scoot, leaving you with one more view of my latest narrative sculpture.

The title was taken from a Craigslist ad
Share this:

What Do (Ceramic) Artists Want? A Blog Blast

Today's Kiln Yield (the good ones, anyway)

Before delving into the main question, here’s what I mean by a Blog Blast. For the past few years I’ve written longish posts. I compose and edit as I go (a not so good idea), making nifty essays which even I did not have time to read, even though they were worth it, IMHO. No more. Here’s to the short, pithy, candid and extemporaneous post. Longer than a Tweet or a Status Update, shorter than War and Peace, or even a term paper. Still worth it. Still friends.

All Bow!
I know what I want from my ceramic endeavors: the realization of what I had in my head to begin with, only better! I want the Kiln Gods to undo my ham-handedness, my fear and laziness, my lack of knowledge and brain farts. I want nothing less than Transformational Magic, that slice of perfection that no ceramic piece in the world has heretofore attained…until now. All bow.

I’m no different. And sometimes I do get that, briefly. As in performance arts, I feel I am only as good as my last kiln opening. So, when I don’t get the fairy dust, this is how I understand it.

Did I Take the Short Way Home?
Warps, cracks and breakage is the norm for mishandled clay. Glazing faults abound: wrong material/color choice, misapplied, too shiny, streaky, runny, bubbled. These are obvious flaws (except when they’re not because you wanted this exact messed-up result. After all, it’s contemporary art we’re talkin’ about!) Flaws are mostly not too fixable. Better to love and honor the quirky properties of clay and glazes on the front end. But when it does not go well in these departments, have your disappointment, even your everlasting shame and tantrum, then get out the hammer and start over. Oh, and learn to gently amend and refire a little too. Smash seven times, make anew eight. Get back on the cylinder that threw you. Learn to fly with your craft, bird by bird. No way out but the long way.

Got Appreciation for What Is?
What’s harder to understand is when a piece is gorgeous, but just not the specific gorgeous its creator intended. It happens to all of us: the heatwork of the kiln changes things and we hold treasure and call it trash only because it wasn’t what we ordered. The piece is too dark, off the expected color, bled or shrank weirdly. Whatever it is, it failed to meet our prior specs and we’re ready to smash once again. But wait! Tuck this one away somewhere, maybe for months, and then look at it without the pangs of former expectations. You might return to the “amend and refire” mode, you might decide it’s a true goner, or you might see it for what it is.

What to Want
And here’s the Tricky Bit: Don’t settle for “good enough.” Good: the enemy of Best, right? While it might sound like I suggest seeking only objective perfection, it’s really personal excellence which excites me. I may joke about wanting it all from the Kiln Gods, but I know what I alone put out there steeped in my heartfelt best comes back. Often better than I know to want, challenging me to keep stretching. I seek repeated opportunities to do exactly that.

That’s what (ceramic) artists really want.

Share this:

How to Color Your Own Ceramic Aquarium Gravel

Thickening without Glassifying

If you think that generating thousands of just-right tiny chunks of dried clay in order to have ceramic aquarium gravel is madness, you would not be far wrong. But it ends up the rewarding kind of madness, as you shall soon see.

I really did not think this through! But how could I? No one I know and no one they know has done this, so it has been necessarily one foundering discovery after another.

After hand-generating the gravel, those buckets of tiny bisqued chunks need coloring. But glazing them won’t work; the glass-forming ingredients in glaze will simply fuse them in a lump to the kiln shelf. A rookie mistake. Perhaps a nice effect when done on purpose, but for another project. (Hindsight Hint: generate the next batch of aquarium gravel with pre-colored clay and call it done!)

If I couldn’t use glaze, then would mason stains, oxides or underglazes stick well and evenly? The viscosity of underglazes can be thin and take three coats to cover well, but they seemed to offer the strongest color in the easiest format.

At the first try, the bits got too wet and wound up unable to bind with the color. It looked a little like bluish barf: color in a flat puddle punctuated by the pinkish chunks. Dang. I let them dry overnight while I felt a bit queasy over it. I considered the possibility of resorting to acrylic paint….but that thought both freed me and bolstered my resolve to find a fired-on solution.

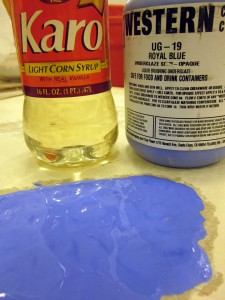
I talked with the deeply resourceful Gail Ritchie and we agreed we needed to add something which would sticky-up the underglaze, but not be glassy in the slightest. We came up with CMC gum fixative, Karo Syrup, honey, maple syrup…..all of which we theorized would help the underglaze attach while it dries and then burn away in the kiln, it’s job done, leaving the gravel in beautifully-colored separateness.

Karo Syrup was handy. Karo worked! Best use for Karo Syrup since homemade popcorn balls.

I added a few large drops of Karo to about 2T of underglaze…stirred well, and then mixed in the gravel sample to make a thick and dry-ish sticky mound.

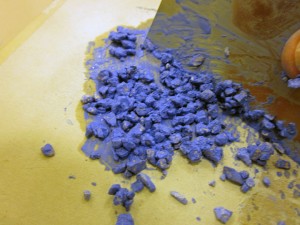
Mixing the Bisqued Gravel with Karo’d Underglaze

For most of my samples, I used a heat gun to gently dry and separate each pile and then handled it as little as possible to avoid knocking off any hard-won color. I left one pile wetter and fully connected, just to see if that mattered…and while every sample fired up evenly colored and separate, the wetness of that one damp batch left a lot of color on the kiln shelf, which I needed to scrape off and re-coat the shelf with kiln wash. It’s worth it to dry things before firing them.

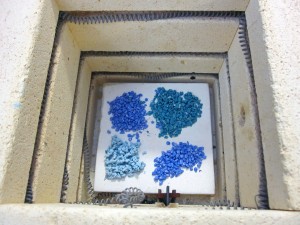
Here’s what the little test kiln known as Sparky looked like when I opened it the next day. So fine!

Lovely little colored piles

Ceramic aquarium gravel-making has been the full creative catastrophe, with a happy ending. I’ve worked harder both physically and mentally and it’s taken scads more time than expected. Ironically, this gravel is only a bit player – pun intended – in the finished ceramic Aquarium Set-Up For Sale piece I envision. In that respect, it’s like fine silk lingerie, something usually only the wearer knows about, but great for self-confidence.

Every speck of ceramic aquarium gravel represents the whole effort to me now and I find I cannot let even one fall off the board or over the edge of the kiln shelf. They’re shards of meaning and intent, like artistic DNA, each carrying the whole idea.

Share this:

How to Make Your Own Ceramic Aquarium Gravel

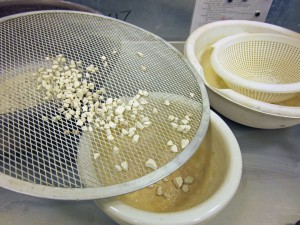
Bone Dry Chunks with Bowl and Sieve Labscape

Notice I only said How and not Why.


If you’re thinking of real gravel for your real aquarium, the Why becomes problematic. Why do that when it will take a full workday plus overtime to grind enough gravel to fill a ten gallon tank to two inches? Why ever do that when there are unknown toxicity issues with underglaze and oxide colorants that your prize fish may demonstrate by dying on you?

No, this gravel-making is a completely sculptural endeavor of my own device. It’s one item of many spurred by the Cabrillo College Ceramics Department’s proposed installation at the annual California Conference for the Advancement of Ceramic Art held in Davis, CA at the end of April.

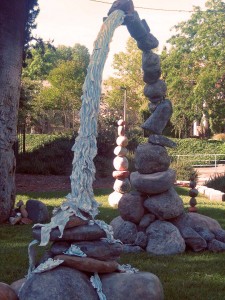
A Magic Realist Ceramic Rock Portal

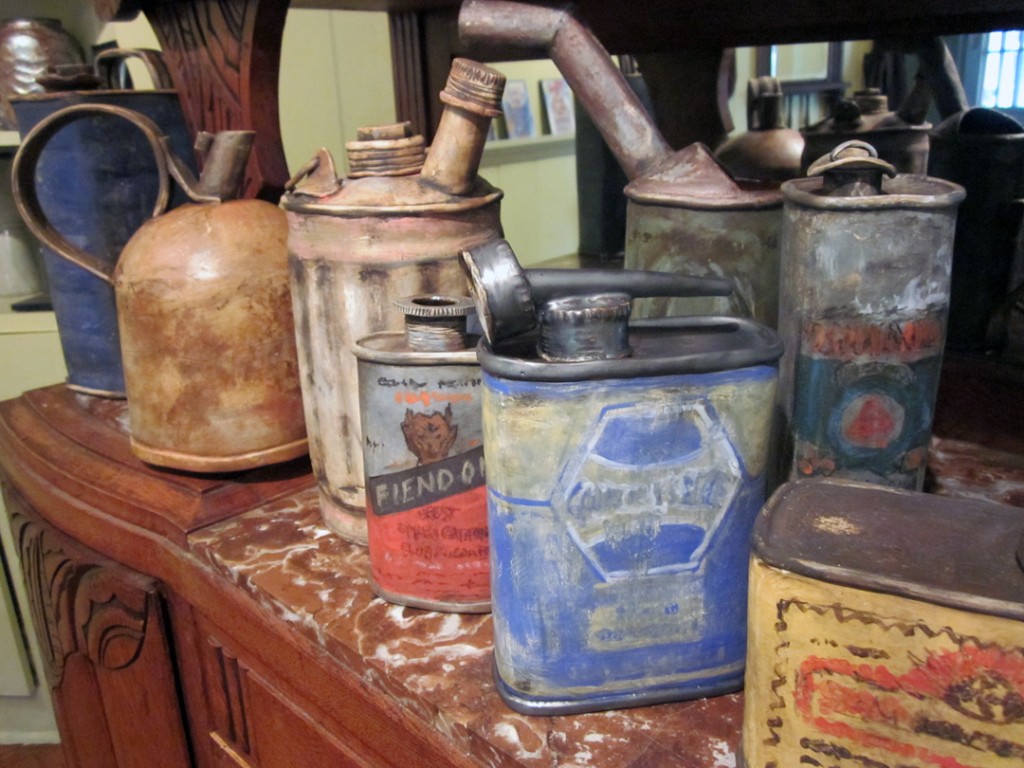
We’re following up our fantabulous 2010 Cabrillo Rocks Portal installation -pictured above – with a life-sized out-on-the-lawn trompe l’oeil ceramic Yard Sale! Folks are right this minute working on fishing gear, globes, games, toys, linens, shoes, hats, bags, skateboards, dolls, a bake sale and then whatever else we can concoct between now and then.

I’m offering a used aquarium set-up: a real aquarium with clear glass, but with the frame painted white (like all our tables, shelves and props will be) and everything else in it ceramic. I plan delicious tongue-in-cheesy mermaids, sunken ships, broken Greek columns…along with faux warped and stained cardboard boxes containing the pump, heater, filter, and canisters of fish food, medicines and a net. A complete mock set-up! Just needs fish and water. $30 OBO.

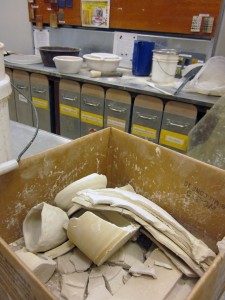
Hence the gravel. It’s important to the faux-y integrity of the piece for me to make my own. But HOW???? My first approach was to bust up bisqueware with a hammer. Too hard. Too sharp. Too uncontrollably uneven. It’s much easier to chunk up potato-chip brittle bone dry clay – which is essentially “dust held together by memory” according to one wise kiln tech I have known.

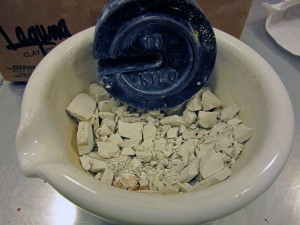
I used a mortar/pestle in the clay lab, but started with the densely heavy 10kg weight as shown below.

Bonedry wares returning to Dust

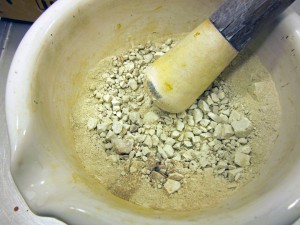
Then came the pestle which got the pieces to a mix range of pure dust to pea gravel sized.

Crush Just Fine Enough, No Finer

Next, a trip through a series of fine to coarse strainers and meshes straight out of my kitchen. Put the gross chunks through a fine sieve to get rid of the dust and too-teensy bits, pour what’s left onto a pizza screen and shake. The perfect size falls through!

Fine mesh behind; Pizza screen mesh in front

Continue to crunch up the leftover big pieces, then sieve, screen and shake a few more times. Sieve the inevitable dust out of the desired gravelly size and collect in buckets until there is enough volume to acceptably fill the tank. Plan on around ten hours of this in order to have enough volume, factoring in the clay body shrinkage.

Also factor in sore shoulders, upper back and arms, temporarily-impaired hearing from hours spent in the drone of the glaze room’s exhaust fan, and the gag factor from wearing a particulate mask until the creases in your face are nearly time-worn. All pretty unavoidable.

I’m pleasantly aware that making gravel this year is an act of “decomposition” regarding last year’s rocks and am lovin’ the strange parallel.

In the next-related post on this topic: garishly coloring this gravel and making tired boxes and whatever else has come up.

Share this:

Claiming A Character in a Plain Clay Cylinder

Each face is unique; it has to be

A new series of face jugs has begun! Similar to the Local Talkers 2009 in that they are based on the faces appearing in the 2011 Local Talk column of the Santa Cruz Good Times, but different because each one is full-sized and meant to be a stand alone work.

I’ve lifted some of the limits I placed on myself in 2009, in that I can choose one or more faces/respondents a week, or none. And I can base my choice on expression and/or on what the person says.

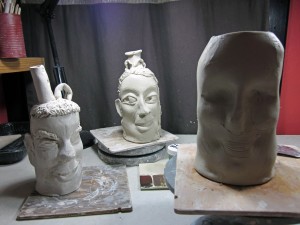
Each jug is stamped with that person’s first name, last initial and one word of their reply to the question of the week. In the top photo are, left to right, Cecil U. Stopped, Kate K. Y and what eventually became Nicole B. Amphitheatre.

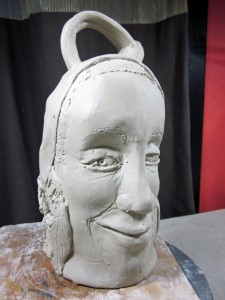
Here she is at leatherhard before being cleaned up and getting the base coat of underglazing.

Love the headband and the earrings!

And just for fun, here’s a close up of the source face.

Facing the camera and smiling slightly

For me it’s not about creating a photographic likeness, but an energetic and gestural one. The clay jug form has its own demands that must be served. The cylinder needs to balance in all ways. It can only stretch so far. It can’t get too heavy with add-ons. (Hair!!!!) It needs to function as a vessel, although I’m finding I care less and less about that as I go deeper into sculptural expression. I just might be getting to the same place as sculptural teapots which are generally full of narrative and SO not meant to be used for serving tea!

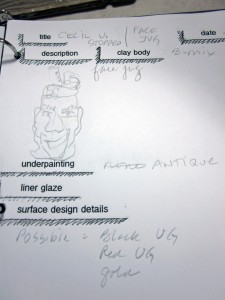
I am keeping better studio records this time too. Here’s the page so far for Cecil U. Stopped.

SO much better than binder paper!

So, that’s my Studio Report at the outset of one thematic series I will be exploring this year. The face jugs provide a looser more organic foil to the other works I’ve got going and I like that I get to find my way from the plain cylinder to the character waiting to take form.

Share this: