The Yearly Studio Clearing Ritual: Making Way for Awesomeness

StudioRitual2013


For a few years now, somewhere in December,  I hold a little private ceremony in my studio. It lasts maybe 20 minutes and has no real agenda except for me to pay attention and respond to what I feel. (I’m somewhat allergic to prescribed rituals of any sort.)

I clean the space up a bit beforehand, nothing major. I settle in some special objects: flowers, candles, something aromatic for the air, a ceramic piece or two, a bit of fruit, a shot of herbal bitters.Read More >

Share this:

500 Books and Two for the Desert Island


I love a wall of books. It unfailingly rightens and reassures my weary, distracted world.

Not just anyone’s wall will do, though.  I need my hand-selected wall: that mish-moshed reflection of personal passions and meaning,  in which each volume has survived at least one of my annual-ish purges, if not decades of them.

While I gather new books often, I let go of plenty. Some go to the local library, some to trade at Logo’s, the local used book buyer/seller. (Where I easily spend my cash and trade-in credits on more.)

Novels and pop culture bestsellers – if I don’t request them from the library – tend to come in and go out.

My keepers?  Vintage tomes, family works (yes, I’m related to more than one published author) and Art: history, artists, philosophy, creative process and technique, i.e. reference books.Read More >

Share this:

Chase the Dream, Not the Competition


After six years,  I’m stepping away from the Santa Cruz County Open Studios Art Tour for at bit. I won’t even apply again until 2015 at the earliest. Good for me!

Like eating peanuts, I made sure I ended on a good one. This year’s effort was my best showing ever, in both artwork and presentation. It had the most attendance (over 400 visitors) and satisfying sales numbers in all categories.

I know other local artists who create a on-off Open Studio schedule, some as an every-other-year practice, some sporadically, as other projects and interests allow. Might it work for me?Read More >

Share this:

After the Firing

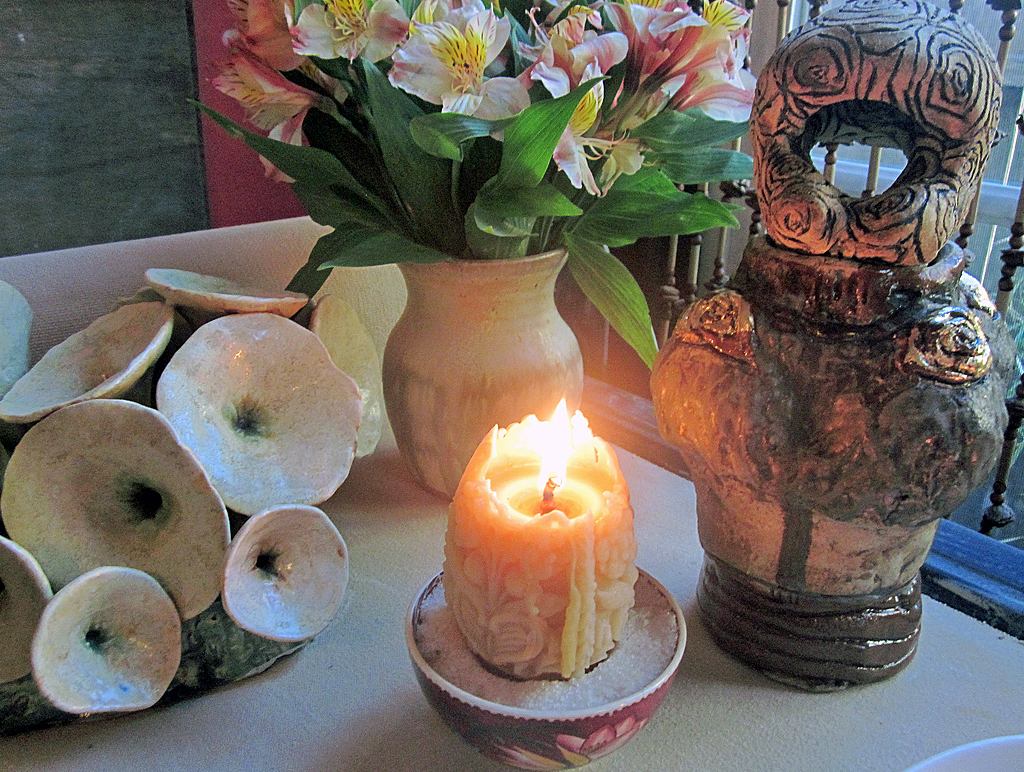
You might tend to think a ceramic artist pulls her work hot out of the kiln, lets it cool and plops it on the sales table, doneAnd there ARE tales of potters doing just that at their kiln openingsAh, were it that simple for me!  What follows are a few illustrated reasons why, in my world,  there’s a slight cha cha interlude from kiln to market.

The particular firing illustrated here was the most recent I unloaded. I photographed the steps I usually take with my pieces.  From waiting for the right time to unload to putting a sticker on the bottom, there are lots of hoops.


The Kiln – with Thumb Genie and Humorous Caution Sticker. I double-crossed my fingers with this giant and varied load. Firing my biggest kiln, Tsunami, always feels like I have too many eggs in one basket. To add to the apprehension, the last couple of firings revealed some serious cracking issues which might reappear. Still, there is no way out but through, so I loaded, left it on low to preheat the work slowly, closed the lid on a slow firing cycle, thinking I would just sneak up on it all.


Next morning, I am almost happy when the kiln is too hot to open yet. Saves me the knowledge of certain success or certain failure and lets me stew longer.  Here’s the pyrometer saying it’s WAY too hot to even peek. Ahhh.


At under 300 degrees, it’s only sort of OK to peek briefly because it shocks and cracks the glazes. Lower than 200 degrees, I can prop the lid and help it cool faster. My first brave and nervous glimpse says all is well from the long view. I cannot stress how much of a relief this is after a night of cracked-up and distressing dreams.  I wear my well-used Ove Gloves when I unload just in case I hit a hot bottom or something.


After the long view (nothing blown  up or majorly cracked apart at first sight) there is the not-s0-small matter of whether the lids release. I  build my lids with a bit of ease (aka “shuffle”) around the spouts/flanges, but everything gets so soft in the heatwork of the kiln, it’s not uncommon for random spots to stick together, especially if gravity and proximity are involved. Before firing I paint on generous coats of wax-with-added-alumina and even so, stick happens. A completely stuck-on lid means a lost piece, so I’ve learned to breathe deeply and tap a wooden stick with gentle authority on a stuck lid. Too much force and something breaks off. Not enough, and the glassy connector-spots don’t separate. Always nerve-wracking. This was the only stuck on lid in the load and gave up after 20 or so gingerly assertive taps.


I inspect each piece as I take it out of the kiln. Top, bottom, sides, handles, spouts, seams, attachments. Anything come undone? Anything displaying movement or warping? I also test each piece for water-tightness. I put a bit of water in each one and let it sit on a paper towel for a few minutes, which is what you see here. It’s pretty clear when I’ve got a leaker and sometimes it is from the least visible places. After the close inspectiion and the water testing, I can let myself start to believe I have a viable piece.


Next comes sanding. I don’t generally glaze my exteriors, but I’ve learned they LOVE being sanded. Just a quick pass with a fine grit and we have a silky smooth surface to touch. If more is needed, there is the alumina stick or the piece of broken silicon carbide kiln shelf to knock chunks off. Every piece gets lightly sanded at the minimum. Every now and then there is  a sharp edge to amend.


Let’s measure! Height x Width x Depth….Cannot do this before the final high temp firing because things shrink just that much more. That info gets entered on the individual studio log sheet I keep detailing the forming and decorating.


Here’s a studio log sheet for one piece: Title/Description, Inventory/Category Number, Sketch, Clay Body, Underpainting, Liner Glaze, Surface Design, Firing Notes, Refiring Notes,  Dimensions, Price, Show Record, Purchase Notes. This page has evolved over the years and I need to make some updates, but the idea has served me well since my student Glaze Logs. I keep several binders of these pages, filed for the different types of work I do. Some similar groups have spread sheets instead of individual pages. I also have binders for Sold or otherwise GONE work. It’s a LOT of maintenance and worth it.


In the past year, I have added this digital way to keep track of my work. Artwork Archive is a great adjunct to my written studio notes. I don’t add every single piece, just the ones that have gone out into the world to galleries or exhibits. After the completely tedious data entry part, all I have to do is click and I can see what work is where. Helps me stay sane and feel competent.


Every piece gets photographed. This actually has to happen before the digital Artwork Archive can be completed, but the photo set-up, the shots, the editing, resizing and organizing will go on with or without that. I have several sizes of light tents, backdrops and lights, but I tend to use the simplest version of everything. Digital cameras and all are so good, I just don’t stress over the photo documentation like I did say ten years ago.


An inventory sticker goes on the bottom of each piece and the whole scene is connected. I will add a separate price sticker sometime in the future, which means I will return to the Studio Log and Artwork Archive. Before pricing,  I usually set out all my work and physically move it around trying to understand goodness, value, artistic merit, improved design, market rates and past sales in a holistic way before I price anything. It’s probably the hardest part.


The upshot of this whole process is I intimately know each of my pieces, start to beyond the finish firing before they fly away into the hands and hearts of my collectors.


-Liz Crain, who, if she had been told ahead of time about the After the Firing ministrations needed, might have not gotten so deep into this clay thing. But then again, it’s pretty much a moot point now, right?


Share this:

Tales of the Workshop: In Which Art and Spirit Meet the Creative Process in a Clay-Collage Mash-up


The Workshop  Art and Spirit led by the venerable Coeleen Kiebert, is a way to access and define one’s creative vocabulary, personal imagery, art-making process and style. Held at her stunning sea-view ceramic studio in Rio Del Mar – which also manages to be intimate and comforting – we found sharing, guidance and time for insights. While I’d taken this course in a longer format over a decade ago, it simply can’t be called a repeat; I am just not the same artist as when I first learned these methods. My goal was to arrive with as few expectations as possible, stay in the moment and tell the truth. Oh, and to circle back around to the intelligent, protective energy that Coeleen provides. What a week!

Day One: Re-steeping myself in Coeleen’s descriptive creative process and beginning again with the making of a found imagery collage on a huge 18×24 paper support. We are silent and it takes hours finding the pictures and words to select, where to place and interrelate each piece.  The collage-making proved intuitive and I did not over-think it.  Coeleen suggested we pause and look for evidence of the four elements in our imagery and colors.  I found tons of Earth (natch), reasonable amounts of Fire and Water, but almost NO Air. When the seabreeze kept lifting my unattached piles of papers and blowing them upside down and into different arrangements, I decided that Air was playfully present and I did not need to try to represent it with imagery. I dreamt of my images that night and returned in the morning to attach the last ones before we gathered to share and respond.


Day Two: Collage completed,  Coeleen introduces The Map, a conceptual grid of thirds which aids in interpreting our images by where in the rectangle they have been placed. The grid includes a continuum from unconscious to conscious, higher and lower realms, fears, undeveloped concepts, dreams, outward and inward movements, archetypal and Shadow areas.  What images and colors did I repeat or put in prominent positions? What meanings can I pull from them, literal, analogic and metaphoric? These represent a language I think in: a glimpse of my image vocabulary. She suggested we pick three images and fashion them in clay,  recommending that one of them be an image we don’t quite understand or are disturbed by.  I started with the piano-playing hands and the seed image from the lower left, then went to the straight-forward ceramic pitcher, the vessel near the center.  Side pieces appeared, but it was great to work with clay independently of needing it to have any sort of outcome: just be there and be attentive and responsive to what comes up. I could not decide on a third piece, but slept on it.


Day Three: In the morning I quickly made two clay pieces from collage imagery I did not understand. They were curvilinear and abstract,  and I wound up liking both really well, even if I still didn’t quite get them.


In the late morning Coeleen guides us to The Doodle as way to access a personal style. We have a few warm-up doodles and we’re off for an uninterrupted time, moving the oil pastels silently and goal-lessly over the page however we like. And, yes, it IS touchy-feely in just the right way: a supremely visceral and kinesthetic experience for me. Outcome is not important, but I do find myself wondering what the page “needs” to express itself: Another color? Another series of marks in this corner? It was a dialogue. We hung our doodles next to our collages and began to notice similarities of colors and patterns,  the division of space, the energy expressed. The collage and doodle processes are so different, and yet the results are clearly cousins!


Day Four: Time to doodle with the clay!  Grab a grapefruit-sized lump of clay, work with eyes closeddoodling in 3D for at least 15-20 minutes, open your eyes and continue working.  Out came this giganto spiky pod thing! What is similar here to my previous collage and doodle imagery? What has evolved? Insights? I’m beginning to think I enjoy seed pods and potential growth more than I thought I did.


Day Five: This last day is dedicated to refining the clay pieces and making one last foray into something we each wanted to understand better. I found myself making another collage. In this one I specifically was asking to understand what the concept of vessel means to me. The night before I had looked up all the meanings of the word, so I let myself find the right imagery for ships and veins and containers, even metaphoric ones as in, “He was a vessel of the Lord.”  I placed the new collage next to the old one, with my doodles and clay work alongside. I find only a few connections, and only the ones I had intentionally put there; I’m spent.  But the other workshop folks pointed to one similarity after another, the unity being obvious to them. And obviously I have tons more to apprehend, which I take as a Very Good Thing.


Coda: I took my wet clay pieces home,  finished and fired several.  The one I still don’t quite understand – the screw-like piece taken from the first collage – got a coat of black underglaze and after firing it,  I covered it unevenly with thin gold leaf. The aim is to have it look more like the mysterious gold object (originally an artifact in a National Geographic.) It’s hanging on the wall a glance away, just to the upper left of my monitor, the spot on The Map where dreams reside.


– Liz Crain, who is so happy to be working this way again, she signed on for six more weeks at Coeleen’s studio starting in late October!


Share this:

Thistlethwaite and Haste: Failure as a Metaphor for Success


While I’m busy making other plans for aesthetic awesomeness and cultural dominance,  clay unfailingly reminds me to cleave to patience and humility. To aim high, show up in the studio, stay the course and remain grateful for it all: those bedrock opportunities for excellence.

The piece pictured above, the thoroughly cracked Thistlethwaite and Haste, has given me once again an ironically humorous lesson I guess I am doomed to repeat to the extent that I become happy about it.

This re-decorating and re-firing should have been a slam-dunk. I was just adding a fillip or two to a relatively plain piece from last year. It’s something I have done successfully many, many times before, whether as a subtle touch-up or a complete re-do.

Because an important part of my new artistic direction is to make my own brands, logos, slogans and tag lines, I delved deep on the design details and the painting, set it in the kiln, fired it to a ridiculously low temperature compared to where it had already gone…and… opened the lid to an unequivocal failure.

As best as I can figure, there were stresses hiding in the clay. Where, how and why are perhaps unknowable. Maybe they were always there. Was it due to forming issues? (But why didn’t they show up at the first higher temp firing?)  Was it between the tensions of inner and outer surface treatments? (Hmmmm.) The relative speed of the kiln temperature changes? What? While it is good to suss out the reasons for problems, sometimes – OK, often – they just are the way they are…Shrug and go on.

Yet, yet…..The meaning of that title…..

Was there Haste involved? Impatience?  Imperiousness? Maybe.

The clay and the kiln both replied: Thistlethwaite.

Sigh. It’s almost a Jungian dream message.


And there’s more!

Here’s the back.


More evil sproing cracks and that tag line: publishing to the DEVIL.  To do so is to reveal your fond intentions to the wrong person or at the wrong time. Wait, could that mean me? I’ll take it as a kicker, for I think the kiln genie was definitely out dancing with the ghost in the machine this time around.

I will certainly remake this piece in some fashion, maybe a bit more intentionally, with love and laughter. Its ironic title and all the extras I added around the sides make me chuckle, even with those cracks. And that is exactly the Success part of this Failure I am most happy about.

–Liz Crain, who realizes that speaking of all this here may or may not help the Devil calm down and just go along with her plans.

Share this:

That’s the Way the Animal Cracker Crumbles


It starts with the intention to make molded clay animal cracker pins to raise money for Cabrillo College’s Ceramics program and ends with….ceramic animal cracker pins that do just that.

But the journey is the interesting part. Not the noun what, but the verb how.

Let’s enjoy the fascinating loop-de-loops, curious sidetracks and obtuse angles to get there, learning a thousand things that don’t work on the way.

At first,  testing to find the best approach:Which clay?  Body stain or not? Oxide washes? Underglazes? Glaze? Testing, testing, testing. Always comparing the results to a real sample, which is surprisingly ORANGE toned. Important, too, are the molding methods and whether or not to add any clear glaze. (In this case, no, unless you want frosted animal crackers!) What you see above are the first efforts, which admit a bunch of possibilities, most of which prove unsuitable. Next slide, please!


After a few more trial runs and notes, the Final Four Finishes (ignoring the clear glaze on some of them) sit alongside a real cookie and ask for comparison. The crowd-sourcing group preferred #4 without the glaze, and so did I,  so that finish was the emphasis in the next round:

The Final Four Finishes Favorite with an added toasty edging. Could anyone guess the real ones from a random grouping of clay? In this shot the real ones are turned over, but most could not distinguish among the lot beforehand. The closest guesser noticed the excess material at the mold’s edge, not the applied colors. The job ahead was clear: make neat moldings and color them well.


And that’s what I did. Nearly four hundred crackers, pressed and molded neatly. Over twenty of each kind!


And bisque fired in several tumble-stacked  layers.


Most of the animal cracker shapes were clear: Lion, Giraffe, Gorilla, Koala. But there was one Mystery Animal. That’s the cracker at the bottom of this photo. Was it a pig? A big dog? A lactating mammal with gills? It provoked a lot of feedback and speculation to my Facebook query. But the definitive list of official Nabisco Animal Crackers appeared from a Friend, identifying it as….. a hyena. Really? Ah so. We also learned that the older molds from older crackers were larger and more detailed than the fresh-out-of-the-box-this-week cracker molds. Ah, profitability.


The task at hand: to color and glaze fire the collection. The sheer volume is daunting. Time to put tailbone on the stool and just get it done.

And the first fired round turned out too dark and blotchy! At least with low-fire clay and underglazes, an artist can just re-apply the lighter color treatment and refire. A burnt cookie is a burnt cookie, but a burnt clay cookie mostly just needs color adjusting and refiring.  That’s what you see in the shot above, lightening each one to send back into the kiln once again.


With a successful RE-firing, it’s time to glue on the pin-backs.  Long live E6000, or at least its smell.


A few fully formed, fired, re-fired and fitted animal cracker pins for fabulous fund-raising.

–Liz Crain, who thinks a curiously tenacious work ethic, a few laughs, and raising funds for Cabrillo College’s Ceramics Program are definitely worth the kink in her neck from hours in the same intent position.

Share this: